

POPULAR AT FAMILY HAVEN
POPULAR AT FAMILY HAVEN
Affiliate disclosure: This post contains Amazon.com links. Soulfully Deared may earn a commission from qualifying purchases at no added cost to you.
As an Amazon Associate I earn from qualifying purchases.
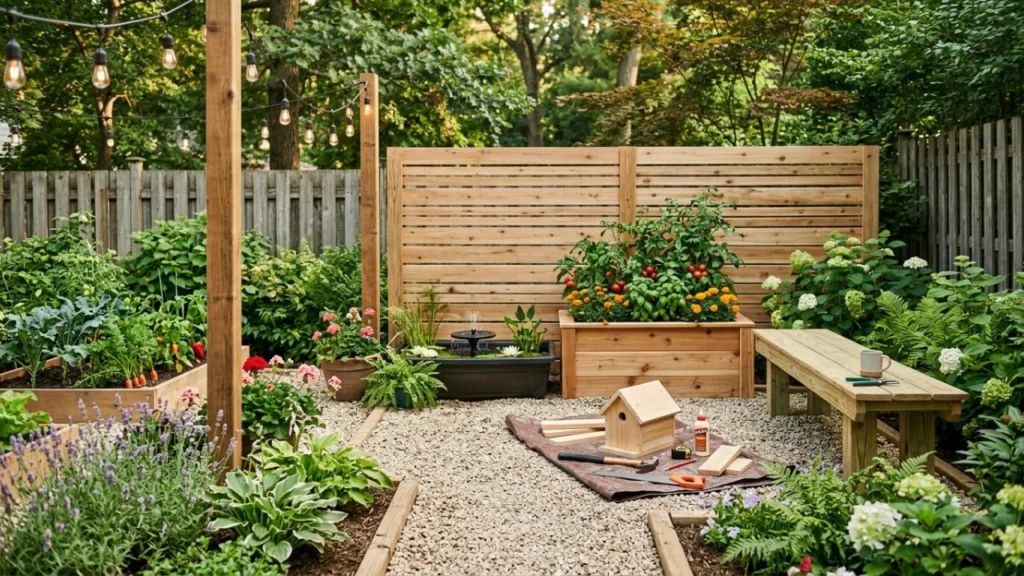
A backyard can collect a strange list of small annoyances. The hose lies in the flower bed, the patio has nowhere to set a drink, the neighbor can see straight into the chair you actually use, and the dark corner by the steps disappears after sunset.
That is why the best diy outdoor projects do not start with a long shopping list. They start by fixing one friction point you notice every time you step outside.
For this guide, think in six jobs: contain, screen, sit, light, grow, and move. Pick the job your yard needs most, then choose a project that matches your time, tools, exposure, and budget.
You do not need to build all 18. One well-chosen weekend project can change how a backyard works far more than five decorative purchases that never solve the original problem.
Start with the project that removes the most repeated annoyance for the least work. Edging, a side table, a small planter, and solar lighting are easier starting points; raised beds, benches, privacy screens, and larger post projects need more cutting, fastening, leveling, or site planning.
| Backyard problem | Good first project | Difficulty | Budget pressure |
|---|---|---|---|
| Beds look messy | No-dig garden edging | Easy | Low |
| Patio feels dark | String-light planter posts | Easy | Low to moderate |
| No herbs near kitchen | Vertical herb planter | Easy | Low |
| Nowhere to set drinks | Patio side table | Easy | Low |
| Muddy garden route | Gravel path edge | Easy | Low to moderate |
| Patio lacks focal point | Container water garden | Easy, with safety planning | Low to moderate |
| Need planting space | Planter box or raised bed | Weekend | Moderate |
| Need climbing support | Trellis | Weekend | Low to moderate |
| Tools are scattered | Garden tool station | Weekend | Low |
| Hose looks untidy | Slatted hose box | Weekend | Moderate |
| Need a seat | Outdoor bench | Weekend | Moderate |
| Need privacy | Slatted privacy screen | More involved | Moderate |
| Want seating + planting | Planter bench | More involved | Moderate |
| Need work surface | Potting bench | More involved | Moderate |
| Need movable privacy | Tall planter with trellis | More involved | Moderate |
| Want overhead light | Solar-light canopy | More involved | Moderate |
| Need narrow serving area | Outdoor console ledge | More involved | Moderate |
Backyard budget rule: Spend first on the part that must survive weather, weight, or repeated use. Decorative extras are easier to change later than a warped bench frame, loose screen, or badly placed post.
Outdoor work has three extra questions that an indoor shelf does not: what gets wet, what touches the ground, and what can move in wind.
For pressure-treated lumber, read the end tag instead of assuming every board is rated for the same exposure. AWPA’s treated wood categories distinguish exterior above-ground use from ground-contact use, and ground-contact projects need lumber rated for that condition.
Fasteners matter too. Preservative-treated lumber can be more corrosive to metal hardware, so follow current fastener corrosion guidance and the lumber manufacturer’s requirements instead of reaching for leftover interior screws.
If a project needs post holes or other digging, contact the local utility-locate service first. In the United States, safe digging guidance says to contact 811 a few days before digging so buried utilities can be marked.
Those checks are not the fun part of a Saturday project, but rebuilding a screen because the base moves in wind is considerably less fun.
These first six diy outdoor projects can make a visible change without turning the whole yard into a work zone. Most need basic measuring, a drill or mallet, and a clear stopping point.
A clean edge gives a flower bed, tree ring, or narrow garden strip a visible boundary. It is a good first project when plants are fine but mulch and lawn keep bleeding into each other.
Lay out the curve with a garden hose before installing anything. Gentle curves usually look calmer than a row of small wiggles, and they make mowing or trimming easier around the border.
A no-dig system also keeps this project smaller because you are not cutting a continuous trench. The EasyFlex garden edging kit (paid link) is a 15-foot plastic system with anchoring spikes designed for flower beds, tree rings, straight runs, and gentle curves.
Best for: messy bed lines, tree rings, and small garden borders.
Skip it if: you need a structural edge to hold back a deep gravel base or a meaningful change in grade.
Two heavy planters with upright posts can define a seating area without attaching lights to the house. The planters act as the base, while the posts create height above a patio or gravel pad.
Make the bases wide and heavy enough for the post height, and place them where people will not walk into guy lines or low-hanging bulbs. Wind exposure matters, so a tall narrow pot is a poor base even if it looks good empty.
Solar lights simplify placement because you do not need an outdoor receptacle at the exact end of the run. The Brightech solar string lights (paid link) are an outdoor 27-foot solar set with 12 LED bulbs and a detachable solar panel.
Best for: patios, gravel seating zones, and places where permanent attachment is limited.
Watch for: post stability, panel sun exposure, and enough overhead clearance.
A narrow tiered planter can put herbs near the kitchen door without giving up much patio floor area. It also turns an empty wall or fence-adjacent strip into useful growing space.
Keep the depth modest and stagger the planting levels so the upper box does not shade everything below it. Add drainage holes and small feet or spacers so the bottom board is not sitting in trapped water.
Pocket-hole joinery can keep visible faces cleaner on a small wood build. The Kreg pocket-hole jig (paid link) works with material from 1/2 inch to 1 1/2 inches thick and can form concealed joints; use exterior-rated screws that suit the wood and exposure.
Best for: herbs, shallow-rooted annuals, and compact patios.
Avoid: making every tier the same depth if the lower plants will lose too much light.
A compact side table is one of the smallest backyard projects that changes daily use immediately. It gives a chair somewhere for a drink, book, lantern, or gardening gloves without filling the patio with another large piece of furniture.
Use a top wide enough for two or three objects, then keep the base narrower so feet have room beside the chair. Leave small gaps between top slats when the design needs rainwater to leave rather than sit on the surface.
For a clean frame with fewer visible screw heads, the Kreg pocket-hole jig (paid link) can join the apron and legs from the inside. Pair it with exterior-rated fasteners and an outdoor wood finish.
Best for: balconies, decks, small patios, and single-chair corners.
Good budget move: use sound offcuts from a larger outdoor project when the species and thickness fit the plan.
A short gravel path makes sense when the same strip of lawn turns muddy because everyone already walks there. Instead of fighting the route, formalize it.
Mark the path first and walk it a few times before moving material. Keep the route wide enough for its real use, and plan where water will drain so the low point does not become a shallow channel after rain.
The EasyFlex garden edging kit (paid link) can define the planting-bed side of a light garden path or separate a decorative border from lawn. It is not a retaining wall, so do not ask it to hold back a deep grade change.
Best for: garden access, shed routes, and side-yard shortcuts.
Spend on: base preparation and drainage before decorative gravel.
A watertight tub, glazed container, or half-barrel can become a small patio water garden without excavating a full pond. This is a strong choice when you want one living focal point rather than another piece of patio decor.
Choose the location before filling it. Illinois Extension’s container water guidance notes that water weighs about 8.3 pounds per gallon and that a 20-gallon water garden can exceed 200 pounds after the container, plants, soil, and water are included.
If the container has steep sides, add stones or a ramp so wildlife can get out, and place open water carefully around young children. RHS wildlife pond guidance recommends an escape route for wildlife and warns that even a mini pond can present a hazard for young children.
A slatted wood sleeve can hide a plain utility tub. The DEWALT drill driver kit (paid link) is made for home DIY drilling and screwdriving and fits that optional outer-frame job.
Best for: patios, small yards, and wildlife-minded garden corners.
Skip the fountain at first: a planted still-water container is simpler, and splashing can leave nearby paving slippery.
These projects need more measuring, cutting, fastening, or soil work, but they are reasonable weekend goals when materials are ready before Saturday morning.
A rectangular planter box can define the edge of a patio, soften a fence line, or create a planting zone where the ground is poor. Cedar costs more than basic untreated softwood, but its decay resistance makes it useful outdoors.
Build the box around the mature size of the plants rather than the size of the nursery pots. Add drainage and keep the base from holding wet soil directly against decorative outer boards that are not meant to stay saturated.
The Kreg pocket-hole jig (paid link) is useful for joining rails and legs on a framed planter while keeping hardware less visible. Use exterior-rated screws and choose screw length for the actual board thickness.
Best for: patio edges, herbs, flowers, and ornamental grasses.
Budget choice: one larger planter that defines a zone can be more useful than six unrelated small pots.
A raised bed is worth building when poor soil, compacted ground, or easier reach is the real problem. A four-foot width is common because the middle can be reached from both sides without stepping into the bed.
For an edible bed, untreated cedar is a straightforward route if you want to avoid treatment questions beside the growing soil. Penn State also recommends a starting mixture of roughly 70 percent soil and 30 percent compost in its 2026 soil health guidance.
A cordless drill makes assembly less tedious when the frame uses repeated screws. The DEWALT drill driver kit (paid link) includes two batteries, a charger, and a bag and is intended for drilling and screwdriving in home DIY work.
Best for: vegetables, herbs, cut flowers, and poor native soil.
Plan first: sun, reach, irrigation, drainage, and how the soil will reach the finished bed.
A freestanding or planter-mounted trellis gives climbing plants a clear route upward and can add partial screening without creating a solid wall. Keep the pattern simple enough that the plant remains the main visual element.
For a small trellis, evenly spaced verticals with two or three cross rails are easier to build than a detailed lattice. Think about mature plant weight and how wind will push against the leafy surface later in the season.
The Kreg pocket-hole jig (paid link) can make concealed joints in a framed wood trellis. Use exterior-rated fasteners and make the base or attachment strong enough for the site.
Best for: clematis, annual vines, climbing vegetables, and planter screens.
Do not guess: plant-support needs differ, so match spacing and height to what you intend to grow.
A narrow tool station can hold long-handled tools vertically near a shed or covered work zone. The point is not to build a cabinet; it is to stop rakes, shovels, and brooms from becoming a pile.
Use a wide base or secure the station appropriately so pulling one tool forward does not tip the rack. Keep heavier items low and leave enough slot width that handles can come out without moving everything beside them.
The DEWALT drill driver kit (paid link) fits the repeated drilling and screwdriving this project needs. Predrilling can also help near board ends where splitting is more likely.
Best for: sheds, covered side yards, and garage-adjacent garden zones.
Weather note: if it sits fully outdoors, use material and finish meant for that exposure rather than treating it like indoor garage storage.
A hose box can hide the loose coil without trapping it inside a sealed wet container. Slatted sides allow more air movement and can visually match a bench, planter, or privacy screen made from the same wood.
Do not make the opening so small that winding the hose becomes irritating. The box should be easier to use than the pile it replaces, or the hose will be back on the ground within a week.
A small frame with slatted faces is a natural use for the Kreg pocket-hole jig (paid link) because the frame joints can sit behind the visible faces. Use exterior-rated screws and leave clearance around the faucet and hose connection.
Best for: patios, side yards, and hose bibs near seating areas.
Do not seal it tight: drainage and drying matter more than making it resemble indoor furniture.
A basic bench earns its space when people actually need somewhere to sit, not merely because an empty wall looks unfinished. Start with a simple straight seat before adding storage, curves, a backrest, planters, and an arbor to the same build.
Seat comfort comes from proportion and stability. Make a full-size mock-up with boxes or scrap boards before cutting the final lumber so you can judge seat height and depth against the people who will use it.
The Kreg pocket-hole jig (paid link) can join a bench frame with concealed pocket holes in compatible board thicknesses. For a load-bearing seat, follow a proven structural plan instead of deciding frame spacing while you build.
Best for: fence-side seating, garden views, and compact patios.
Spend on: a stable frame, suitable fasteners, and weather-ready wood before cushions or decorative pillows.
These ideas use taller assemblies, larger frames, or more site-specific decisions. They can still fit a weekend, but the planning belongs before the lumber is cut.
A privacy screen works best when it blocks the view that bothers you from the place you actually sit. Screening one defined section behind a dining or lounge area can be more useful than trying to hide every property line.
Horizontal or vertical slats let you control how closed the screen feels. Before building a freestanding version, think about wind, soil, base weight, post depth, local rules, and where the screen could fall if it failed.
RONA’s current privacy-wall instructions similarly make foundation selection dependent on placement, soil, and wind.
The DEWALT drill driver kit (paid link) suits the repeated drilling and fastening needed for a slatted screen. If posts enter the ground, contact the utility-locate service first and use lumber rated for the actual ground exposure.
Best for: exposed seating zones, hot-tub sightlines, and dining corners.
Smarter layout: screen the seated view first instead of building a wall everywhere.
A planter bench combines two jobs in one footprint: seating and planting. It works along a blank patio edge where separate pots and loose chairs would use more floor area.
Keep the planter compartments visually connected to the bench but manage water separately. Soil and irrigation should not keep structural seat framing wet.
The Kreg pocket-hole jig (paid link) can join the bench and planter frames with less visible hardware. Because people will sit on it, use a tested plan, exterior-rated fasteners, and board sizes appropriate for the span.
Best for: small patios, fence lines, and garden corners.
Budget warning: a combined piece can save floor space but usually uses more lumber than a plain bench, so build it only when you need both functions.
A potting bench gives seed trays, pots, hand tools, and bags of mix one working height instead of spreading them across the patio. A narrow version can sit against a shed or wall without taking over the yard.
Plan the bench around the jobs you actually do. One lower shelf for soil or pots and a simple back rail for hand tools may be more useful than tiny drawers that collect labels and string.
The Kreg pocket-hole jig (paid link) can keep frame joints tidy on a basic wood potting bench. If it stays outside year-round, lift the legs off consistently wet ground and choose an outdoor finish or suitable wood.
Best for: seed starting, repotting, and container gardeners.
Skip: an oversized back panel if it blocks light or catches wind in an exposed location.
A deep planter with a tall trellis can create movable green screening on a hard patio where posts cannot be dug into the ground. It is also easier to reposition than a fixed screen if the sightline changes seasonally.
The base must be proportionate to the height above it. Soil adds weight, but tall leafy growth also adds wind load, so do not treat a narrow decorative planter as a structural base.
The Kreg pocket-hole jig (paid link) can help assemble planter and trellis frames. Use exterior fasteners, drainage, a stable footprint, and plants whose mature size suits the container.
Best for: hardscaped patios, movable screening, and climbing plants.
Think ahead: decide where winter storage or seasonal plant care will happen before making the finished planter too heavy to move.
Instead of running lights around the entire fence, hang one deliberate canopy above the table or lounge zone. That concentrates light where people sit and gives the seating area a clear boundary after dark.
Use existing structures only when they are suitable for the load, or build properly anchored posts. Keep lights out of head space and away from branches, doors, or moving umbrellas that could catch them.
The Brightech solar string lights (paid link) are outdoor, solar powered, and weather resistant, with a 27-foot run and 12 bulbs. Place the panel where it receives adequate sunlight rather than hiding it under the shade structure you want to illuminate.
Best for: dining tables, gravel lounges, and pergola edges.
Plan the night view: one intentional light zone can look more settled than bulbs spread across every backyard boundary.
A slim console or bar ledge can sit behind a bench, against an exterior wall, or along a railing where a full dining table would be too deep. It is useful for serving drinks, holding plant pots, or keeping grilling items off the ground.
Keep it narrow enough for circulation but deep enough that a glass or plate does not sit on the edge. If it is freestanding, give the base enough depth and weight that someone brushing past cannot tip it.
The Kreg pocket-hole jig (paid link) can hide frame joints beneath the top and inside the legs. Use exterior-rated screws and a finish suited to sun and rain when the ledge has no roof above it.
Best for: narrow patios, behind-sofa surfaces, and compact grilling zones.
Budget advantage: this can use less material than a full table while solving the same need for a landing surface.
Weatherproofing starts with material choice and drainage, not a final coat applied after the build is finished. Use lumber rated for its exposure, corrosion-resistant fasteners compatible with treated wood, and details that allow water to leave instead of remaining inside joints.
For pressure-treated lumber, the end tag matters. AWPA categories distinguish exterior above-ground and ground-contact uses, while the American Wood Council advises following treatment and hardware requirements for corrosion-resistant fasteners and connectors.
Cut ends and drilled holes in preservative-treated lumber may also need field treatment according to the treatment system and applicable instructions. The American Wood Council points to field treatment for cut ends and holes under AWPA guidance.
With cedar or another naturally durable wood, finish is still a maintenance decision rather than a one-time promise. Sun, rain, freeze-thaw cycles, and standing water can change wood over time, so design for drainage and expect periodic inspection.
Save on decorative complexity. Straight slats, square planter boxes, simple legs, repeated dimensions, and one wood species can keep cutting and waste under control.
Spend where failure creates more work: ground contact, structural fasteners, stable bases, drainage, and the surface people sit or walk on. A decorative finish is easier to redo than a wobbly privacy screen.
Reusing leftover exterior-rated wood can make sense for side tables, small shelves, or planter trim when the pieces are sound and long enough.
Do not use badly split, rotted, or unknown treated scraps merely because they cost nothing.
A raised bed should be narrow enough to reach the middle without stepping into the soil. Penn State’s raised bed guidance uses a common four-foot width, while other Penn State guidance notes that most vegetables need roughly six to eight hours of direct sun.
For soil, Penn State’s current soil health guidance recommends roughly 70 percent soil and 30 percent compost as a starting mix. Local soil, crop choice, climate, and irrigation still affect what works best.
Do not place a bed where roof runoff or yard drainage will constantly dump water into it.
The point of a raised bed is more control over the root zone, not a rectangular place to collect every storm.
The container must hold water, sit on a surface that can support its filled weight, and suit the plants you choose. Illinois Extension says watertight containers from small pots to much larger vessels can work, while also warning how quickly filled weight increases.
Planting depth matters too. Aquatic plants have different preferred depths, so containers can be raised on bricks or inverted pots instead of placing every plant on the bottom.
For wildlife access, a container with steep sides should include stones, logs, or a ramp in and out. The RHS also warns that even a mini pond can be hazardous for young children, so water features need careful placement.
Garden edging, a small patio side table, planter posts for solar lights, a simple planter, and a short gravel path edge are sensible starting points. They have a defined finish line and do not require a large permanent structure.
It depends on the repeated problem. Edging changes a messy border, a side table makes seating more usable, lighting extends evening use, and a privacy screen changes an exposed seating area.
A planter box, raised bed, simple trellis, tool station, hose box, or straight bench can fit a weekend when the plan, cuts, hardware, and materials are ready before you start.
Both can work, but they solve the durability question differently. Cedar has natural decay resistance, while pressure-treated lumber is sold in use categories for specific exposure; read the end tag and match the material to above-ground or ground-contact conditions.
Yes. Outdoor exposure and preservative-treated lumber can increase corrosion risk, so use fasteners and connectors rated for the wood treatment and exposure instead of leftover interior hardware.
In the United States, 811 says every dig requires a locate request and recommends contacting the service a few days before digging. Outside the U.S., use the local utility-locate service for your area.
Repeat one material or color, keep the project scale in proportion to the yard, and solve one clear function.
A single cedar tone repeated across a planter, side table, and screen can connect separate projects without buying matching sets.
Often, but site preparation depends on drainage, existing vegetation, soil concerns, and what you plan to grow.
Remove persistent weeds, keep the bed level, and use clean soil and compost suited to the crops.
Check the deck’s ability to support the filled weight before placing a large container. Water weighs about 8.3 pounds per gallon, so the load rises quickly after adding the vessel, plants, rocks, and soil.
Detailed planter boxes, privacy screens, trellises, benches, raised beds, string-light posts, and water-garden builds can each justify their own measured plan when search demand supports it.
This hub is for choosing the right project and understanding the main decisions before you commit.
The best diy outdoor projects begin with something your backyard keeps asking you to fix. Maybe you need one clean border, one private chair, one dry path, one place to set a drink, or enough light to stay outside after dinner.
Choose that problem first, then choose the smallest project that solves it well. Measure the site, check the weather exposure, buy the material for that job, and finish one thing before the backyard turns into six simultaneous Saturdays.
A better backyard does not need more projects. It needs the right first one.
To decide where your finished project belongs, explore our outdoor-space ideas. Plan one useful seating, planting or lighting area before adding another project to the list.
Explore original printables, find another story or save your next creative project.