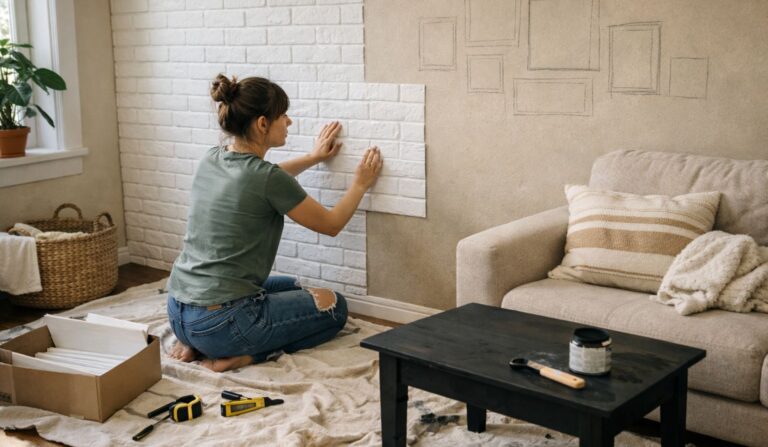


TL;DR
The best DIY home decor projects are not the ones with the most dramatic before-and-after photos. They are the ones you can finish, clean up and enjoy before Monday.
- Have an hour? Change hardware, repaint a plant pot or give a tray a new finish.
- Have a few hours? Try a wall border, gallery wall, mirror frame or narrow entry shelf.
- Have half a day? Add one floating shelf, a picture ledge or peel-and-stick wallpaper inside a nook.
- Have one day? Paint an interior door, bookcase backing, closet interior or headboard shape.
- Have the full weekend? Try one small trim wall, a side-table update or a stencilled backsplash.
- Count preparation, drying, second coats and putting everything back. The time spent holding the paint roller is rarely the whole project.
- If you rent, check your lease and test removable products on your actual wall before covering a large area.
- If a $40 project needs four tools you do not own, those tools are part of the real cost.
You probably do not need a complete room makeover.
Maybe the room needs one door with some colour.
Maybe the dresser is perfectly good, but the handles are doing it no favours.
Maybe the books currently living beside your bed would enjoy the dignity of a shelf.
That is where DIY home decor projects can make sense. One contained change can fix the thing that has been bothering you without sacrificing every free hour between Friday night and Monday morning.
And there is another advantage to starting small: you get to see what the room actually needs after the first change.
That matters.
Painting one door might be enough.
Changing six handles might be enough.
Hanging one shelf might finally solve the bedside mess that convinced you the whole bedroom needed redoing.
If you want more inspiration after choosing your project, these small weekend DIY ideas stay focused on contained updates such as paint, shelves, hardware and smaller wall changes.
How to Choose Weekend DIY Home Decor Projects
Start with the time and tools you really have.
Not the imaginary Saturday where nobody calls, nothing needs washing, the hardware shop is five minutes away and every screw comes out politely.
| If You Have… | Start With… | Tool Level | Mess | Main Thing to Check |
|---|---|---|---|---|
| 30–60 minutes | Hardware, tray, plant pot | Basic hand tools | Low | Measurements or surface type |
| 2–4 hours | Gallery wall, mirror, wall border | Basic | Low to medium | Layout and drying |
| Half a day | Floating shelf, picture ledge, wallpaper nook | Drill may help | Medium | Wall type and measurements |
| One day | Door, bookcase backing, closet colour | Painting tools | Medium | Prep and recoat time |
| Full weekend | Trim wall, furniture update, backsplash | More tools or prep | Medium to high | Cutting, drying and surface prep |
Pick the Finish Line First
Before you buy anything, finish this sentence:
“By Sunday evening, this project is done when…”
For an interior door, “done” might mean:
- door cleaned
- hardware removed or protected
- surface prepared
- paint applied
- second coat finished if needed
- hardware back on when the finish is ready
- supplies put away
That is a project.
“Maybe I’ll paint some doors this weekend” is how three doors end up propped against dining chairs on Sunday night.
Use Friday Night for the Boring Bits
You do not have to start the real work.
Use 15 or 20 minutes to:
- move furniture
- check measurements
- clean the surface
- remove old hardware
- charge the drill
- read the paint or adhesive instructions
- put your supplies together
- check that nothing obvious is missing
The Saturday version of you will be grateful.
Especially when you discover on Friday that you own twelve drill bits and somehow not the one you need.
21 DIY Home Decor Projects Worth Giving a Weekend
The best DIY home decor projects solve one visible problem at a time. I would rather see you finish one shelf properly than spend Sunday staring at three half-painted pieces of furniture and wondering when optimism became project management.
1. Paint One Interior Door
A door gives you a generous block of colour without asking you to repaint the whole room.
Try:
- deep olive
- muted burgundy
- chocolate brown
- dusty blue
- warm terracotta
- soft black
I especially like this when the walls are already neutral and you want something stronger without adding another object.
Make the Weekend Version Smaller
Start with one door.
Not every door in the hallway.
Not the trim “while you are at it.”
Not the nearby console because the paint is already open.
One.
Clean the surface first and use a paint system suited to the existing finish. If you need the order of cleaning, preparation, painting panels and applying another coat, this interior door painting guide gives you a clear sequence. Sherwin-Williams classifies its example as a one-day beginner project and includes drying time between coats.
Best for: bedrooms, home offices, hallways and pantries.
Watch for: assuming “paint time” is the same thing as “project time.”
2. Change Cabinet or Dresser Hardware
If the furniture is still doing its job, start here before replacing or repainting it.
A row of dated handles can make an otherwise decent dresser look older than it is.
Before ordering replacements, check:
- how many you need
- whether each piece has one hole or two
- existing hole spacing
- screw length
- drawer or door thickness
- marks left by the current hardware
For two-hole pulls, measure centre to centre, meaning from the centre of one screw hole to the centre of the other. This cabinet hardware measuring guide explains the measurement and screw-length check clearly.
The Fastest Version
Buy hardware that fits the holes you already have.
Once you start filling old holes, drilling new ones and repainting drawer fronts, your 45-minute hardware change has quietly applied for a promotion.
Best for: dressers, vanities, cabinets and sideboards.
No power tools: often, yes.
3. Install One Floating Shelf
Use a floating shelf because the wall needs storage or display space, not simply because the wall has had the audacity to remain blank.
Good uses include:
- bedside books
- entryway keys
- a few kitchen items
- bathroom storage
- framed photographs
- a plant and small objects
Before buying it, tape the shelf dimensions onto the wall.
Look at the depth, not only the width.
Walk past it.
Open nearby doors.
Sit where you normally sit.
A shelf can look beautifully slim on a product photo and feel unexpectedly committed when its corner keeps meeting your shoulder.
Wall construction, the shelf system and what you plan to put on it all affect mounting. This floating shelf installation guide is a useful next read before drilling.
My Weekend Rule
Install one shelf.
Style it.
Then decide whether the wall genuinely needs another.
4. Paint the Back of a Bookcase
This is one of those small changes that can make an ordinary bookcase feel more connected to the room.
You leave the frame and shelves alone and paint only the backing.
Try:
| Bookcase | Backing Colour |
|---|---|
| White | Muted olive |
| Warm wood | Deep blue |
| Cream | Soft rust |
| Black | Clay or mushroom |
| Pale oak | Taupe |
Once the books go back, they break up the colour, so the result feels less like a giant painted rectangle.
Make Saturday Easier
Empty and clean the bookcase Friday night.
That alone removes the least enjoyable part from Saturday morning.
Tip: take a quick photograph before emptying the shelves if you already like the arrangement. You do not have to remember which little vase was somehow making everything work.
5. Add a Picture Ledge
A picture ledge works well if you love moving art around.
Frames can overlap.
A small print can move from one side to the other.
You can change a photo next month without filling another hole.
Use one above:
- a sofa
- desk
- bed
- low console
- dining bench
Do You Need to Build It?
Not necessarily.
If you already have the tools and lumber, a simple ledge can make sense.
If you need to buy a saw solely for this project, a ready-made ledge may give you the same decorating result for less hassle.
That is an important part of DIY budgeting.
The cheapest material list is not always the cheapest finished project.
6. Use Peel-and-Stick Wallpaper in One Small Area
Do not make your first removable-wallpaper project the largest wall in the house.
Start with:
- a desk nook
- bookcase backing
- closet wall
- small entry recess
- vanity wall
- open-shelf backing
A contained area lets pattern do something interesting without asking you to line up roll after roll across an entire room.
Check the Wall Before Falling in Love With the Print
Peel-and-stick performance depends on the surface and the product.
Tempaper recommends a smooth, clean surface in good condition and advises testing textured surfaces first. Their removable wallpaper surface guide is useful before you order enough paper for the whole project.
Renter tip: “removable” does not mean “guaranteed to behave exactly the same on every landlord’s paint job.”
Test a sample.
7. Paint a Wall Border or Lower Colour Block
You can change the proportions of a wall without painting the whole room.
Try:
- one straight horizontal band
- lower-wall colour
- simple stripes
- a restrained scalloped edge
I would begin with the straight version if you are new to paint projects.
Tape the height first.
Then stand across the room and look again.
A line that seems perfectly placed when your nose is six inches from the wall can look strangely low once the sofa is back.
If you need painter’s tape for this and the other painting ideas, this Amazon.com USA blue multi-surface painter’s tape is the 0.94-inch by 60-yard ScotchBlue roll I checked. The listing is for one blue roll; Amazon availability and sellers can change.
A Small Money-Saving Move
If you already have suitable leftover paint, use it.
A border does not need a shopping trip simply because the internet turned the project into a 14-item supply list.
8. Update One Small Side Table
A small side table is a much kinder place to learn than a six-drawer dresser.
First ask what it actually needs.
Maybe:
- a deep clean
- different hardware
- new paint
- stain
- minor surface repair
Do not start sanding automatically.
If the Existing Finish Is Old or Unknown
Stop before creating dust.
For pre-1978 painted residential surfaces, the EPA warns that disturbing lead-based paint can create hazardous dust. Their lead-safe DIY guidance explains what homeowners should check before repair or painting work.
If you do not know what you are working with, finding out is part of the project.
Beginner shortcut: change the hardware first. You may decide the table never needed repainting.
9. Add Picture-Frame Trim to One Wall
Wall trim can give a plain dining wall, entry or bedroom a little more structure without covering it in objects.
The part people underestimate is not the idea.
It is the cutting.
A traditional picture-frame trim project can involve:
- measuring
- angled cuts
- adhesive
- nails or pins
- filler
- caulk
- paint
This is why I would keep your first version small.
This Old House rates its simulated panel project moderate and shows the measuring, cutting and fitting involved in this wall molding installation guide.
Start With Two or Three Frames
You can create a focal section behind:
- a dining table
- console
- bed
- entry bench
You do not need to panel the hallway, stairs and landing because the first rectangle came out nicely.
10. Make a Fabric-Covered Pinboard
This one earns its space because it can look good and make the room work better.
Use it in:
- a home office
- bedroom
- homework area
- kitchen planning corner
- entry area
Choose a fabric you still like when half the board is empty.
That is the real test.
The pinboard will not always be covered in beautifully arranged postcards and colour-coordinated notes.
At some point, there will be an appointment reminder and a takeaway menu involved.
Make It Fit the Room
If the fabric has a strong print, keep the frame quiet.
If the fabric is plain, you can use a darker or more noticeable frame.
11. Paint the Ceiling in a Small Room
This is one of my favourite DIY home decor projects when the room needs personality but has no spare floor space.
Try it in:
- powder room
- office
- small bedroom
- reading room
- walk-in closet
Possible colours:
- pale blue
- muted olive
- warm beige
- soft clay pink
- chocolate brown in the right room
Test the Colour Overhead
Do not judge the sample only on a vertical wall.
Put a painted sample board overhead or test an appropriate area.
Then check it in daylight and again with your evening lights on.
Ceiling colour can feel completely different once it is above your head.
Skip it for now if: you have unexplained water marks, peeling paint or ceiling damage that needs attention first.
12. Create a Gallery Wall Without Guessing
Lay the arrangement on the floor first.
You will learn more in ten minutes there than you will after putting six unnecessary holes in the wall.
Mix pieces that mean something to you:
- photographs
- prints
- postcards
- small paintings
- drawings
- old book plates
Your frames do not have to match perfectly.
They need enough connection that the group feels intentional.
Architectural Digest’s gallery wall hanging guide recommends considering wall type and frame weight and planning the arrangement before making holes.
Nervous About Placement?
Cut paper to each frame size.
Tape the paper shapes to the wall.
Move them until the spacing feels right.
Walk away for a while.
Come back.
Your wall will survive the rehearsal.
13. Paint a Thrifted Mirror Frame
The mirror itself may be fine.
The frame may be the part making it feel dated.
Try:
- dark brown
- matte black
- warm cream
- muted green
- an aged-metal look using a coating suited to the material
First identify what the frame is made from.
Wood, plastic, metal and previously painted surfaces may need different preparation.
Protect the Glass Properly
Mask it.
Do not trust the plan where you “will just wipe the paint off later.”
That plan always sounds strongest before the paint dries.
14. Paint a Headboard Shape
A painted headboard gives the bed a visual frame without adding furniture.
This works especially well in a small room.
Try:
- wide rectangle
- lower-wall block
- simple arch
- broad block extending behind both bedside tables
Test the Shape With Tape
Make the bed first.
Tape out the width and height.
Stand in the doorway.
Does it frame the bed?
Does it feel too narrow?
Does the top stop in an awkward place?
Solve those questions before paint gets involved.
Simplest version: a straight-edged rectangle or colour block.
Curves look simple after they are finished. During the measuring stage, they can develop opinions.
15. Paint the Inside of a Closet
Closets can handle colours you might not want across the whole bedroom.
Try:
- deep green
- muted blue
- terracotta
- ochre
- rich brown
This is especially good if the closet doors stay open often enough for you to enjoy the colour.
Empty It Properly
Do not paint around hanging clothes.
You know how that story ends.
Use Friday night to empty and clean the closet.
Saturday becomes painting day.
Sunday gives the finish more time before everything goes back.
You may also discover that four empty shoe boxes have been receiving free accommodation for several years.
16. Give a Plain Tray a Better Finish
A tray is a low-pressure project with a clear finish line.
Use it for:
- coffee-table items
- keys
- dresser bottles
- bathroom counter pieces
- remotes
Paint it one colour or line the bottom with a suitable decorative material.
Keep the Pattern Quiet if the Tray Will Be Full
Once you add books, bottles, a candle or keys, most of the base disappears anyway.
You do not need to paint an entire mural underneath the television remote.
Sometimes one colour is the better choice.
17. Paint a Small Stencilled Backsplash
This can give a backsplash pattern without removing tile and installing a completely new surface.
But I would not call it a casual one-hour job.
The result depends heavily on preparation and the surface you are painting.
Clean first.
Choose a paint system suited to the surface and expected cleaning.
Practise the stencil before touching the backsplash.
Better Homes & Gardens’ painted backsplash tutorial shows how its project handles alignment, rolling, corners and touch-ups.
Practise on Cardboard First
You need to learn:
- how much paint belongs on the roller
- how firmly to press
- how the registration marks line up
- how the stencil behaves near an edge
It is much nicer to discover you are using too much paint on a cardboard box than behind the kitchen sink.
18. Add a Narrow Entry Shelf
If your entry cannot fit a console, stop trying to squeeze one in.
A shallow wall shelf may be all you need for:
- keys
- sunglasses
- one small bowl
- one framed piece
Tape the shelf depth onto the wall before buying it.
Then walk through the entry several times.
If you keep clipping the taped outline with your shoulder, the wall has already given you its review.
Give It One Main Job
If the shelf is there for keys and mail, leave room for keys and mail.
Do not fill the entire thing with decorative objects and then wonder why the keys are back on the kitchen counter.
19. Paint an Old Plant Pot
This is a good project for the weekend when your ambition says “makeover” and your energy says “we have forty-five minutes.”
Clean the pot first.
Use a coating suited to the pot material and where it will live.
An indoor cover pot and an outdoor planter do not deal with the same conditions.
Try:
- warm cream
- terracotta
- olive
- mushroom
- charcoal
Updating More Than One?
Use two or three related colours.
You do not need to give every pot a different personality.
The plants already brought those.
20. Frame Fabric or Wallpaper as Art
This is the replacement I would choose over trying to turn a lampshade into a complicated craft project.
Use:
- leftover wallpaper
- a piece of patterned fabric
- vintage textile
- decorative paper
- an offcut from another room project
Place it in a frame and let the pattern become the art.
It works well above:
- desk
- dresser
- bedside table
- small console
Why This Is Worth Doing
You can bring a bold pattern into the room without committing it to an entire wall.
It is also one of the easier renter-friendly decor ideas because the material itself does not have to be attached directly to the wall.
21. Give One Furniture Piece the Colour
Choose one smaller piece:
- nightstand
- stool
- small dresser
- cabinet
- console
Then keep the furniture around it quieter.
This is one of the DIY home decor projects I would use when the room needs more personality but repainting the walls feels like too much.
Choose a Piece You Can Actually Finish
Before starting, check:
- material
- existing finish
- repairs
- hardware
- cleaning
- preparation
- primer needs
- paint directions
- drying time
A little bedside table can be a sensible weekend project.
A wall-to-wall built-in is not simply the same idea with more drawers.
DIY Home Decor Projects by Tool Level
You do not need a workshop to improve your home.
| If This Sounds Like You… | Projects I Would Start With |
|---|---|
| I own almost no tools | Plant pot, tray, mirror frame, hardware swap |
| I have a hammer and screwdriver | Gallery wall, hardware, pinboard |
| I have a drill and level | Floating shelf, entry shelf, picture ledge |
| I am comfortable painting | Door, ceiling, bookcase, closet, headboard |
| I can measure and cut accurately | Picture ledge, wall trim |
| I want almost no mess | Hardware, framed fabric, gallery wall |
| I rent | Framed fabric, furniture updates, tested removable wallpaper |
| My room is tiny | Ceiling, painted headboard, narrow entry shelf |
If You Own Almost No Tools, Start There
A project does not become better because it required a power tool.
If your goal is to make the bedroom feel better by Sunday, a hardware change you can finish in 40 minutes may be a smarter choice than a trim wall that teaches you how expensive a weekend can become when you do not own a saw.
Where to Spend and Where to Save
Not every supply deserves equal money.
| Spend More Attention Here | Save Here |
|---|---|
| Correct mounting hardware | Extra decorative accessories |
| Paint or coating suited to the surface | Painting more areas than planned |
| Accurate measurements | Buying a new tool for one tiny job if another route works |
| Preparation supplies you actually need | Matching every frame or handle unnecessarily |
| A shelf that suits the intended load | Styling the shelf before you know what must live there |
Count Tool Cost Too
A project may have $35 of materials and still cost far more if you need:
- drill
- saw
- level
- nailer
- speciality bit
- clamps
- sanding equipment
That does not mean you should not do it.
It means your budget should tell the truth.
Why Weekend Projects Turn Into Monday Problems
You Started With the Inspiration Photo, Not Your Room
The room online may have:
- smoother walls
- taller ceilings
- different light
- somebody else’s tool collection
- a second person helping just outside the camera frame
Borrow the idea.
Scale it to your room.
You Forgot Preparation Time
Cleaning.
Measuring.
Masking.
Moving furniture.
Removing handles.
Waiting for primer.
Those things are part of the project even though nobody includes glamorous photographs of them.
You Bought Before Measuring
Measure:
- wall width
- furniture size
- hardware holes
- shelf depth
- frame dimensions
- doorway clearance
- wallpaper area
Then shop.
Your tape measure should meet the project before your credit card does.
You Added Another Job Halfway Through
The door looks good.
Now perhaps the trim should match.
Then the wall looks tired.
And since the drop cloth is already down…
No.
Finish the job you planned.
You Chose the Wrong First Project
Your first DIY does not need to prove your character.
Pick something forgiving.
Learn.
Finish it.
Enjoy it.
You can become a wall-trim person another weekend.
DIY Home Decor Projects FAQ
What Are the Easiest DIY Home Decor Projects for a Beginner?
Start with something that has little structural risk and is easy to correct.
Good first choices include:
- changing existing hardware
- painting a plant pot
- giving a tray a new finish
- painting a mirror frame
- arranging a gallery wall
- painting one simple wall shape
If you already paint comfortably, one interior door or bookcase backing can give you a larger visual change.
What Can I Finish in Two Hours?
Your best options are projects with almost no construction and little preparation.
Try:
- hardware
- tray
- plant pot
- a few gallery frames
- small mirror frame
- planning and taping a wall border
Remember that “active work finished” and “paint fully ready for use” may not be the same time.
Which DIY Gives the Biggest Change Without Adding More Stuff?
Paint an existing surface.
A door, ceiling, wall block, closet interior or bookcase backing changes a large visible area without adding another basket, lamp, shelf or piece of furniture.
Which Projects Need No Power Tools?
Depending on the existing setup:
- hardware changes
- tray makeover
- plant pot
- mirror frame
- framed textile art
- painted wall border
- painted headboard shape
- some gallery-wall arrangements
That makes them useful starting points if your tool collection currently consists of one screwdriver and confidence.
Which Project Is Best for a Renter?
Start with something that belongs to you rather than the building.
Furniture, framed textile art, pinboards and plant pots are simpler choices.
Peel-and-stick wallpaper can work in rentals, but test the actual wall and read the product instructions first. A removable product can still behave badly on a damaged, textured or poorly bonded painted surface.
Does Peel-and-Stick Wallpaper Damage Walls?
There is no responsible universal yes-or-no answer.
The product, paint finish, wall condition, texture, installation and removal method all matter.
That is why I would test a sample in a discreet spot before committing to a large wall.
Do I Need to Sand Furniture Before Painting?
Not automatically.
Preparation depends on:
- furniture material
- existing finish
- surface condition
- coating you plan to use
If an old painted surface may contain lead or you do not know what the coating is, stop before producing sanding dust and check the appropriate safety guidance.
Are DIY Projects Always Cheaper Than Buying Something New?
No.
DIY can become more expensive when you need several new tools, speciality materials or a second attempt.
Compare the full cost, not only the paint tin.
Sometimes repainting a nightstand makes sense.
Sometimes changing the handles is all it needed.
Sometimes the sensible answer is buying the shelf rather than buying a saw to make the shelf.
How Do I Pick a Project if I Have Only Saturday?
Avoid projects with several dependent stages.
Choose something where a late start does not trap you halfway through.
I would look first at:
- hardware
- gallery wall
- entry shelf
- picture ledge if ready-made
- wall border
- tray
- plant pot
- mirror frame
What Weekend DIY Makes a Small Room Look Better?
Use the surfaces you already have.
Try:
- painted ceiling
- painted headboard
- one floating shelf
- narrow entry shelf
- bookcase backing
- one gallery wall
- one painted door
Those add colour, storage or personality without consuming much floor space.
How Do I Know a Project Is Too Big for One Weekend?
Write every step down.
Then add:
- shopping
- preparation
- drying
- second coats
- installation
- clean-up
- putting the room back together
If that list already feels optimistic before Saturday begins, shrink the project.
One wall instead of four.
One shelf instead of three.
One table instead of the dresser.
That is not doing less.
That is choosing something you can finish.
Finish One Thing Before Starting Another
The best DIY home decor projects leave you with a room you can use on Monday.
Not a dining table buried under tools.
Not six cabinet doors leaning against the wall.
Not a sentence beginning, “I just need another weekend.”
Pick the room.
Find the thing that bothers you most.
Choose one project that fits your time, tools and patience.
Finish that.
Put the tools away.
Then stand back and see what the room actually needs next.
You may be surprised how often the answer is: nothing yet.