
POPULAR AT FAMILY HAVEN
POPULAR AT FAMILY HAVEN

A modern LED feature wall starts with the wall layout, shelf positions and power route, so the lighting and display feel planned rather than added afterward.
A modern LED feature wall with floating shelves can look custom on a normal decorating budget, but the secret is deciding what not to add.
That glowing wall you saved probably looks more complicated than it really is. Strip away the accessories and you are usually looking at a short list: warm wood, soft light, a few floating shelves, one darker contrast, some greenery and enough empty wall for all of it to breathe.
That is good news if your wall is smaller, your budget is tighter or you have no interest in rebuilding half the living room just to get a nice evening glow.
I would not copy someone else’s wall centimetre for centimetre. I would take the parts that make it feel good, then make them fit your room.
If you want to compare how paint, panelling and shelving can share one focal wall, these living room feature walls are useful for seeing how much, or how little, wall treatment you actually need.
Before you choose shelves, decide what your wall needs to do. A pretty wall that blocks a doorway, crowds your TV or leaves three cords dangling down the middle is going to annoy you long after the first “wow” wears off.
Ask yourself what you actually want from it.
Is it there to:
Your answer changes almost everything that comes next.
If the wall is mainly decorative, you can keep the shelves shallow and light. If you want to hold books, larger plant pots or heavier ceramics, the shelf system needs to suit that job.
This is one of those boring little steps that can save you from a much more annoying afternoon later.
Use painter’s tape to mark the actual length and height of every planned shelf.
Then do three things:
A shelf arrangement that looks perfect from two feet away can feel oddly high from the sofa.
If you want a straightforward look at measuring, levelling and installing this type of shelf, this floating shelf installation guide from This Old House is a useful extra read.
Do this before choosing depth.
A shelf for two picture frames does not need the same depth as one holding a substantial plant pot.
Think about:
Architectural Digest’s current floating shelf buying guide also calls out weight capacity, attachment method and shelf length as things worth checking before you buy.
If you want a concrete size reference while planning, this Amazon.com USA walnut floating shelf pair is 24 inches wide, 6.5 inches deep and 1.75 inches thick per shelf, with two shelves in the set. I like it as a size reference, not as proof that 6.5 inches is right for every wall. Measure your own things first.
Seriously, find it now.
Ask:
You do not want to finish styling your dream wall and discover that the nearest outlet is six feet away having nothing to do with your plans.
Three main finishes are plenty for most versions of this wall.
| Wood | Wall | Contrast | Softer Layer |
|---|---|---|---|
| Walnut | Warm cream | Matte black | Green plants |
| Light oak | Soft white | Charcoal | Olive green |
| Dark wood | Mushroom beige | Black metal | Cream ceramics |
| Natural oak | Warm greige | Soft black | Linen and greenery |
You can add small variations, but I would not introduce five woods, three metals and a rainbow of plant pots unless that fuller look is genuinely your style.
If you want the easiest starting point, use three wood shelves at different heights and let warm concealed light sit quietly underneath or behind one or two of them.
The different shelf positions make the wall feel planned without needing expensive joinery.
Try:
You get movement without making the layout feel random.
Across the whole group, you might use:
That is enough to start.
If you want extra shelf-arrangement inspiration without copying another room, these floating shelf styling ideas show how single shelves, grouped shelves and different lengths can change the feel of a wall.
Best for: a medium living-room wall where you want warmth without adding panelling.
My tip: style the shelves once with about 70 percent of the decor you think you need. Live with it for a day before adding anything else.
You do not need to cover the entire wall in wood slats.
A partial slat panel can give you the warm vertical texture you want while keeping the project smaller and leaving plain wall around the shelves.
Livingetc’s wood slat wall ideas include slatted sections used on feature and media walls rather than treating timber as an automatic full-wall finish.
Put them where the wall needs visual weight.
For example:
You pay for less material.
You also avoid turning a smaller room into a wall-to-wall timber box.
Best for: anyone who likes the slat-wall look but does not want the whole room to revolve around it.
A single long shelf can look cleaner than a stack of smaller ones, especially in a minimalist living room.
Place soft lighting behind it so the wall gets the glow rather than the shelf edge shouting for attention.
Try three shapes:
For example:
plant + ceramic bowl + books
That gives you enough variation without covering the entire shelf.
Best for: calm, minimal rooms, entry walls and spaces that already have plenty of furniture.
Budget win: one better shelf may cost less than buying three shelves plus enough decor to fill all three.
If perfectly stacked shelves remind you a little too much of office storage, move them.
Place the upper shelf slightly left, the middle shelf farther right and the lower shelf somewhere between them.
Imagine one large invisible rectangle around the entire group.
Every shelf can move inside that boundary, but the finished group should still feel contained.
Use the same:
Repetition makes the uneven layout feel deliberate.
Best for: modern living rooms that need a little movement without bold color.
Not every LED needs to run horizontally.
A vertical light line can make a narrow wall feel taller and gives you a clean boundary beside two floating shelves.
Try it:
If the vertical line already gives the wall personality, you do not need glowing shelf edges everywhere too.
I would choose one main glow and one supporting glow, then stop.
Best for: narrow walls and small living rooms.
If your inspiration wall has a beautiful curved glow, you can borrow the movement without rebuilding the architecture around it.
Pair straight shelves with one broad curved light boundary.
The curve gives all those horizontal and vertical lines somewhere softer to go.
Small waves can look decorative.
One larger sweep usually feels calmer.
Instead of building a sculpted wall:
This is not the quickest option here, but it gives you a stronger focal point if you are willing to plan it carefully.
A modern LED feature wall with floating shelves works beautifully around a television when the shelves help the TV belong to the room instead of boxing it in.
Homes & Gardens’ TV wall design ideas include floating shelving beside a television as one way to make the screen feel less dominant.
I would usually start with shelves:
rather than hanging a row of substantial objects directly above the screen.
Use less around it.
A big television already gives the wall a strong dark rectangle. It does not need eight frames, five plants and three lights helping it take attendance.
A floating console or slim cabinet can connect the lower part of the wall to the shelving.
It also gives you somewhere to hide the things you do not want sitting on open shelves.
Best for: living rooms where the television already owns the main wall.
Sometimes the problem is not the shelves.
It is the empty lower third underneath them.
A floating console gives the wall a base and brings practical storage into the design.
Closed storage can take care of:
Not everything in your house needs to become shelf decor.
You can:
Best for: TV walls and wide feature walls that feel top-heavy.
If you like a moodier room, warm walnut against mocha, deep brown or charcoal can look rich without needing lots of small decor.
Use controlled warm lighting so the shelves stay visible after dark.
Try:
Your wall already has contrast. You do not need to introduce a new bright color every twelve inches.
Pin or paint a large sample where the shelves will go.
Check it in:
A color can feel warm at noon and much heavier after sunset.
Best for: rooms used most often in the evening.
If walnut feels too heavy, swap it for light oak or another pale wood.
Pair it with cream, warm white or pale greige and use a softer wall wash.
This version is easier on a small room because the contrast stays gentle.
Best for: bright rooms, smaller spaces and anyone who wants modern without dark or dramatic.
An awkward corner does not have to ruin the idea.
Use the corner.
Place a longer shelf on the main wall and a shorter shelf on the return wall. Light one section rather than both.
Before you commit, check:
A beautiful shelf loses some of its charm when you meet the corner of it with your shoulder twice a week.
Because the walls already meet at an angle, you may need less panelling and less decorative layering.
Best for: unused corners, dining-room transitions and odd wall returns.
If your wall is narrow, please do not squeeze the full 17-part fantasy onto it.
Two shelves can be enough.
Use:
Then stop.
A small wall forces you to edit.
That can work in your favor.
You are less likely to keep adding things simply because there is another empty foot of wall.
Best for: spaces beside doorways, small apartments and short wall sections beside sofas.
If you already own plants you love, you do not need to buy a collection of shelf ornaments.
Let the greenery do more of the work.
Try:
The shape variation matters more than filling every shelf.
Use one or two finishes, such as:
The plants already bring color and movement.
Choose a shelf position that suits the plant’s actual light needs.
If the wall is too dark, use something else there rather than repeatedly replacing a plant that never wanted that address in the first place.
Best for: cream, beige and wood-heavy rooms that need something softer.
A wide feature wall does not need shelving all the way across.
Use shelves on one part and art on the other.
For example:
| Wall Area | What to Use |
|---|---|
| Left | Partial slat panel + two shelves |
| Center | One lit shelf or open wall |
| Right | Two framed prints |
You fill the width without buying six shelves.
Thin black frames work well when you already have:
You get repetition without making every object identical.
Best for: broad walls where a shelf-only design would feel repetitive.
If the wall feels heavy around eye level, do not automatically add another shelf.
Look lower.
A long planter, floor plant or low floating cabinet can give the composition the missing weight.
Inside one low planter, vary the shape:
That feels less stiff than lining up identical pots.
Plants, water and lighting hardware need sensible separation. Follow the instructions for the lighting you choose, especially around power components.
Best for: tall walls and shelf layouts that look as if everything is floating too high.
“Renter-friendly” should mean more than sticking something to drywall and hoping for the best.
Start with what your lease actually lets you change.
Use a shelf system mounted as directed, then keep the lighting removable.
A pair of Amazon.com USA black rechargeable wall sconces can add a black lighting accent without hardwiring. The checked black version is a two-sconce rechargeable set with adjustable color temperatures that include 3000K.
You will still need to mount the sconces as directed, and you will need to recharge them.
Do not assume an adhesive shelf is suitable for substantial decor.
Recreate the composition instead:
You can get the layered feeling without pretending the shelf has to float.
Best for: apartments where reversibility matters more than recreating the inspiration exactly.
If you want the fullest interpretation, keep it to five layers.
Choose one:
Choose one main effect:
Stagger them rather than building a rigid stack.
Use:
Choose one or two:
That is enough structure.
You can add personality later without losing the wall underneath it.
My rule: if the empty shelves already look balanced before the decor goes up, you are in a good place.
The lighting on a modern LED feature wall with floating shelves should support the wall rather than become the only thing you can see.
Think about the effect first, then the product.
For living rooms and bedrooms, Lumens places roughly 2700K to 3000K in the warmer residential range. Around 2700K reads softer and more amber, while 3000K is still warm but looks a little cleaner.
Their warm lighting color guide is useful if the Kelvin numbers still feel abstract.
| Light | How It Usually Feels Here | I Would Pair It With |
|---|---|---|
| Around 2700K | Soft, warm, amber-leaning | Walnut, mocha, cream |
| Around 3000K | Warm but cleaner | Light oak, greige, warm white |
| 4000K and above | Cooler and whiter | Use only if that cooler feel suits the room |
Do not choose by number alone.
Turn the light on beside your actual wall color and wood before you fix it permanently.
They do different jobs.
Use it when you want light to fall:
Use it when you want:
Shelf Expression’s LED shelf lighting guide explains how changing the channel position changes where the light falls and also notes that channel dimensions need to suit the strip or diffuser being used.
COB strips pack the light points close together, which can make the illuminated line look smoother than a strip with widely spaced dots.
If that smoother line suits your plan, this Amazon.com USA warm COB LED strip is a current BTF-LIGHTING 2700K option. The checked version is 24V, 32.8 feet long, 8mm wide and listed at 480 LEDs per metre. The adapter and controller are not included, so do not order the strip assuming you have a complete kit.
Sometimes.
A suitable channel and diffuser can still help:
But do not buy the channel before checking its internal size against the strip you plan to use.
Turn the LEDs on.
Sit where you normally sit.
Can you see the strip?
If yes, I would deal with that before buying another piece of decor.
The light should feel as though it belongs to the wall, not as though someone taped it there ten minutes ago.
A modern LED feature wall with floating shelves can lose its calm quickly when the lighting is lovely but the cords are hanging down the wall looking for somewhere to go.
Decide on one power route before the shelves are mounted.
Some systems allow a routed lighting channel or planned cable route.
Follow the exact shelf and lighting instructions rather than drilling your own mystery tunnels through a shelf.
A panel or slat system may give you a neater route for suitable low-voltage cable when the installation is designed that way.
That does not mean hiding mains wiring wherever it happens to fit.
If you do not want to open the wall, a neat cord cover can be the simplest answer.
This Amazon.com USA paintable cable raceway cover is a white D-Line surface channel. The checked product is paintable and supplied in longer 39-inch sections, so a short visible run can blend more closely with the wall.
Three shelves do not need three unrelated cords travelling in different directions.
Work toward one planned route where the products allow it.
If you need new mains wiring, a new outlet or hardwired lighting, use a qualified electrician.
ESFI also warns DIYers to be careful when drilling or cutting into walls where electrical wiring or water pipes may be hidden. Their home electrical safety guide is worth reading before work moves beyond simple removable lighting.
There is no single spacing number that works for every wall.
Start with what you plan to put on the shelves.
If your tallest vase or plant is 13 inches high, the next shelf needs enough clearance that the object does not look trapped underneath it.
Then look at the whole wall, not just the gap.
Before drilling:
Give yourself flexibility.
Do not design the spacing around a collection of tiny objects you might not even own six months from now.
A shelf group should still look good if one shelf holds a tall plant later.
Depth should come from use, not a random number copied from another room.
Ask what you need to fit.
For example:
And check the exact shelf instructions and stated load limit.
I would rather see a slightly deeper shelf that actually holds the things you want than a tiny ledge making every plant look nervous.
You do not need the same design as someone with a different wall, TV, sofa, window and ceiling height.
Use this as a shortcut.
| Your Situation | I Would Start Here | Why |
|---|---|---|
| Narrow wall | Two shelves + one light line | Keeps the wall open |
| Wide blank wall | Three staggered shelves + partial slats | Gives the wall enough scale |
| Large TV | Side shelves + low console | Keeps the screen from feeling boxed in |
| Rental, drilling allowed | Proper shelves + removable lighting | Easier to reverse later |
| Rental, no drilling | Freestanding interpretation | Avoids depending on heavy adhesive shelves |
| Bright neutral room | Light oak + cream + soft 3000K | Keeps the room airy |
| Darker room | Walnut + warm backlight | Adds warmth and definition |
| Minimalist room | One long backlit shelf | Fewer objects, stronger line |
| Plant lover | Three shelves + mixed plant shapes | Plants become the decor |
| Tight budget | Partial slats + two shelves | Cuts material while keeping the idea |
| Awkward corner | One long + one short shelf | Uses the corner instead of fighting it |
For a modern LED feature wall with floating shelves, spend first on the things that affect safety, proportion and the finish you notice from across the room.
Save on pieces you can swap out later.
| Spend More Here | Save Here |
|---|---|
| Suitable shelf system | Extra shelf fillers |
| Secure mounting | Duplicate decor |
| Lighting that suits the room | Lighting every edge |
| Clean cord planning | Decorative cable accessories |
| Wood finish you really like | Slats on parts of the wall nobody needs |
| One or two useful plants | Buying greenery for every shelf |
Cut scope first.
You could:
I would rather see two secure shelves and a clean glow than a wall full of cheaper pieces fighting one another.
The lighting already draws attention to the shelf.
Your decor does not need to compete with it.
A simple shelf combination might be:
tall plant + round vase + low book stack
That gives you height, curve and a horizontal line without needing seven objects.
For example:
or:
A repeated finish helps separate objects feel related.
This is one of the easiest ways to make the wall feel calmer.
Empty shelf space is not unfinished space.
Use a piece that means something to you:
Your living room does not need to look like the accessories aisle forgot to go home.
If you can see a line of tape or obvious light dots from your normal seat, reposition the light or use a suitable concealment method.
Warm walnut under a cold blue-white strip can feel disconnected.
Test the light beside your materials first.
The shelf glows.
The panel glows.
The TV glows.
The console glows.
The ceiling glows.
At some point the wall has stopped whispering and started giving a presentation.
Choose the light that matters most.
Five small ornaments can often be replaced by:
Larger shapes are easier to read from across the room.
If everything sits at eye level, try:
before adding another shelf higher up.
Your room has different:
Copy the relationship between the pieces, not somebody else’s measurements.
This is backwards.
The wall should work before the accessories arrive.
For warm wood and a relaxed living-room feel, I would start around 2700K to 3000K. The warmer end feels softer, while 3000K is a little cleaner without moving into a cool white look.
Use under-shelf lighting when you want light directed below the shelf. Use backlighting when you want a softer halo across the wall.
Move the strip farther from the visible edge, recess it where the system allows, use a denser strip or add a compatible channel and diffuser. Check the result from your normal seating position before fixing everything permanently.
Not always. COB can already look smoother than a strip with widely spaced light points, but a suitable channel can still hide the tape, keep the installation straighter and soften what you see from certain angles.
Two can be enough on a narrow wall. Three often give a medium wall more movement. One long shelf may look better in a minimal room.
The right number is the number that fits the wall without forcing you to fill empty space.
Use your tallest planned object as a starting point, then adjust the spacing for the wall’s scale. Tape the shelves in place first so you can judge the full composition before drilling.
Yes. Side shelves can fill the empty wall while leaving the screen some breathing space. With a large TV, I would usually use fewer surrounding objects rather than more.
No. A partial section can give you the warmth and vertical texture without adding the cost or visual weight of full coverage.
Yes, but follow your lease. If drilling is permitted, properly mounted shelves plus removable lighting can work. If not, copy the layered look with freestanding furniture, art and removable lighting.
They can, but they do not need to be identical. Keeping both woods in a similar warm or cool family is often enough.
Start with a short mix:
You can always add something later. Removing clutter after you have bought it is the less exciting direction.
Good proportions, concealed lighting, hidden cords, repeated finishes and restraint usually matter more than the number of objects on the wall.
Your modern LED feature wall with floating shelves does not need a full custom media-wall budget to feel finished.
Measure the wall. Tape out the shelves. Find the outlet. Decide where the light disappears. Pick the wood. Then stand back before you buy the decorative pieces.
If the wall already feels balanced while the shelves are mostly empty, you have solved the hardest part.
The plant can come later.
So can the ceramic bowl.
And that fourth shelf you were convinced you needed may suddenly look wonderfully unnecessary.
Comments are closed.
Explore original printables, find another story or save your next creative project.

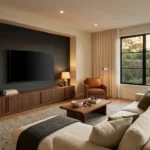
[…] color lighting is part of the room design rather than simply a pathway light, these modern LED feature wall ideas may give you more directions to work […]