

POPULAR AT FAMILY HAVEN
POPULAR AT FAMILY HAVEN
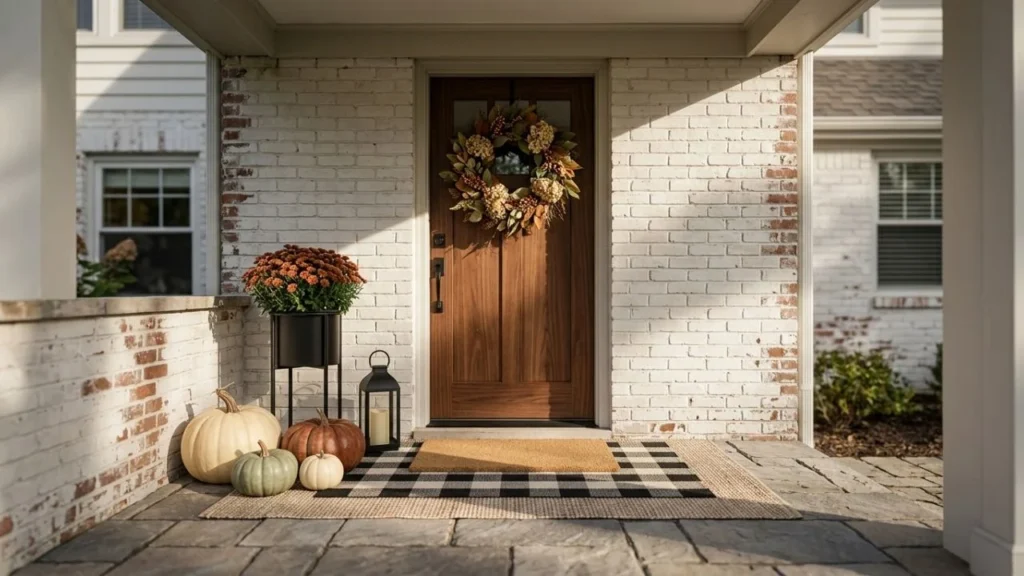
These cottagecore clay pumpkin craft ideas are for the person who loves autumn but does not want another pile of bright orange decorations that look like they came from the seasonal aisle.
Think tiny heirloom pumpkins, pressed flowers, soft mossy greens, old-lace textures, woodland cottages, botanical vines, warm cream clay, crooked stems and pieces that look charming because they are handmade.
If you are a beginner, start with the speckled heirloom pumpkins, sweater-textured pumpkins or pumpkin place-card holders.
If you want something more decorative, try the wildflower pumpkins, botanical vine pumpkins or pumpkin fairy cottage.
If you want something useful, make a pumpkin trinket bowl or little photo holders.
You do not need a pottery wheel or a perfect sculpting hand. A bag of air-dry clay, a few simple tools and one quiet afternoon can get you surprisingly far.
There is a very specific kind of disappointment that happens in fall crafting.
You save a beautiful little handmade pumpkin.
You buy the clay.
You sit down feeling wildly capable.
Twenty minutes later, the thing on your table looks less like an heirloom pumpkin and more like a dinner roll with a twig stuck in it.
That does not mean you are bad at clay.
The trick with cottagecore is that perfection was never the goal.
A slightly leaning stem can look better.
Uneven ribs can make the pumpkin feel older and more natural.
A faded cream finish can be prettier than flawless bright orange.
Tiny dents, botanical marks and hand-painted details give the piece personality.
That is why cottagecore clay pumpkin craft ideas work so well for beginners. The small signs of your hands are often part of what makes the finished piece beautiful.
For more seasonal styling beyond the craft table, these cottagecore fall décor ideas show how natural textures, dried plants and handmade objects can create a softer autumn look.
You do not need half the craft store.
A simple starter setup is enough for nearly every project in this list.
| What you need | What it does | Can you improvise? |
|---|---|---|
| Air-dry clay | Forms the pumpkin | This is the main material |
| Toothpick or skewer | Creates ribs and small details | Yes |
| Clay tools | Makes carving easier | Butter knife or spoon handles can help |
| Small paintbrushes | Paints details and dry-brushes texture | Use what you already own |
| Acrylic paint | Adds the cottagecore palette | Leftover craft paint works |
| Fine sandpaper | Smooths dried rough spots | Optional |
| Parchment paper | Protects the work surface | Wax paper can work |
| Small bowl of water | Smooths tiny cracks while working | Use sparingly |
| Matte finish | Protects decorative pieces | Check compatibility with your clay |
If you are starting from scratch, a block of DAS white clay gives you a neutral base that is easy to paint.
A small set of basic clay tools is useful once you want cleaner grooves, leaves and carved patterns.
For the color work, a few autumn acrylic paints are enough. You do not need twenty shades.
Instead of defaulting to bright pumpkin orange, build your palette around three or four softer colors:
You can still use orange.
Just soften it with brown, cream or a little muted yellow.
That one change can take a pumpkin from “Halloween craft” to something you would happily leave on a bookshelf until Thanksgiving.
Use this before spending an afternoon debating all twelve.
| If you want… | Try this |
|---|---|
| The easiest first project | Speckled heirloom pumpkins |
| Something cozy and textured | Sweater-imprint pumpkins |
| A botanical look | Pressed wildflower pumpkins |
| Something useful | Pumpkin trinket bowl |
| Thanksgiving table decor | Pumpkin place-card holders |
| A woodland feel | Mossy forest pumpkins |
| A more romantic style | Lace-imprint pumpkins |
| Something unusual | Herbarium pumpkins |
| A statement piece | Pumpkin fairy cottage |
| A small gift | Photo-holder pumpkins |
| Mantel decor | Botanical vine pumpkins |
| Something playful | Acorn-cap mini pumpkins |
Now pick one.
You are allowed to come back for the other eleven later.
Start here if clay is new to you.
These pumpkins are simple, forgiving and good-looking even when they are not perfectly round.
The goal is not a supermarket-perfect pumpkin.
Think of the odd little heirloom pumpkins at a farm stand. Some are squat. Some lean. Some have deep ribs. Some barely have any.
That gives you room to relax.
Roll a ball of clay between your palms.
Flatten the top and bottom very slightly.
Use a toothpick, skewer or rounded clay tool to create grooves from the top to the bottom.
Do not make every groove the same width.
Add a small curved clay stem or insert a clean dry twig if that suits your clay project.
Let the pumpkin dry according to the instructions for the clay you are using.
Sand rough spots once fully dry.
Paint it warm cream, faded sage, terracotta or mushroom.
Thin a darker paint slightly.
Load an old toothbrush or stiff brush with a small amount and flick tiny dots across the pumpkin.
Test on scrap paper first.
You want old pottery.
Not paint explosion.
Create three pumpkins in different shapes.
A low cream pumpkin, taller sage pumpkin and tiny terracotta one will usually look more natural together than three identical pieces.
For another straightforward shaping method, this air-dry pumpkin tutorial is a useful beginner reference.
This is where the cottage garden starts creeping into the pumpkin patch.
Instead of painting flowers onto the finished piece, press tiny botanicals into the soft clay first.
Try:
Avoid anything thick and woody that may tear the surface instead of leaving an impression.
Shape your pumpkin first.
Choose a small piece of plant material and gently press it against one section.
Use light finger pressure or roll over it very gently.
Lift the plant away.
You should see the veins, stems or petals left behind.
Repeat around only part of the pumpkin.
Leaving some clay plain prevents the design from becoming too busy.
A warm ivory base is beautiful here.
Once dry, brush a tiny amount of taupe or muted green into the botanical impressions and wipe the surface gently.
The recessed pattern becomes visible without looking outlined.
Place the finished pumpkin beside an old book, wooden candlestick or small bundle of dried flowers.
The styling should feel collected, not staged within an inch of its life.
A chunky knit texture and a pumpkin belong together more than they have any right to.
This is one of the easiest cottagecore clay pumpkin craft ideas for creating a lot of texture without learning advanced carving.
Along with your clay, grab an old knitted sweater, scarf or scrap of textured fabric.
Choose something with a clear weave.
Roll a small sheet of clay.
Press the knit fabric onto it.
Roll over the fabric once or twice, then peel it away.
Now use the textured clay to form the outside of a small pumpkin, or press the fabric gently onto an already-shaped soft pumpkin.
Keep the pressure light.
You want texture, not a flat pumpkin pancake.
Try oatmeal, faded olive, warm taupe or dusty rust.
Dry-brush a slightly lighter color across the raised knit pattern after the base paint dries.
The texture suddenly becomes much easier to see.
These belong near the softer parts of the house.
Think bookshelves, bedroom dressers, reading nooks or a basket beside folded blankets.
If you are decorating the whole room for the season, pair them with these fall entryway ideas instead of buying a completely separate set of decorations.
If sweater texture feels cozy, old lace feels romantic.
And you only need a tiny scrap.
Shape a small clay pumpkin.
Lay lace over one side while the clay is still soft.
Press gently with your fingers.
Lift it slowly.
The little holes, loops and floral sections leave an intricate pattern without you carving every detail yourself.
This one looks more grown-up when the lace appears only on two or three sections.
Leave the rest smooth.
Start with antique white.
Once dry, rub a very thin taupe wash into the lace texture.
Wipe the high spots gently.
A little unevenness makes it better.
If you have an old lace doily or trim that has been sitting in a drawer, using its pattern can turn a seasonal decoration into a small keepsake.
You are not cutting the fabric.
You are borrowing its texture.
This is for the person whose version of fall is less “pumpkin spice” and more “I would like my living room to resemble a tiny forest.”
Shape your pumpkin in a slightly lopsided form.
Make the stem longer and bend it gently.
Use a toothpick to scratch fine bark-like lines into the stem.
Once dry, paint the pumpkin mushroom, muted green or dirty cream.
Use a stiff brush to dab deep green around the stem and down one or two ribs.
Add a tiny bit of lighter olive over the top.
Do not paint moss around every edge.
One concentrated patch feels believable.
Twelve patches look like the pumpkin has developed a medical problem.
A tiny clay mushroom near the base works.
So does one miniature leaf.
Do not add mushrooms, berries, acorns, flowers, vines and three woodland creatures to the same pumpkin.
Cottagecore can be detailed without becoming cluttered.
This is one of the prettiest options if you want your fall craft to look more like pottery.
Shape a medium pumpkin with fairly shallow ribs.
Roll very thin pieces of clay into vines.
Press them gently against the surface.
Add tiny leaves along the vines.
A toothpick can create a central vein in each leaf.
Start near the bottom.
Let the vine curve around one side and climb toward the stem.
Do not wrap it evenly around the whole pumpkin.
That little bit of imbalance makes it feel hand-sculpted.
Try:
One larger vine pumpkin can sit between smaller plain pumpkins.
That gives the eye somewhere to land and stops the arrangement from looking like twelve objects competing for attention.
Tiny pumpkins have one unfair advantage.
They are automatically adorable.
Real acorn caps make them even better.
Roll marble-sized or walnut-sized clay balls.
Add shallow pumpkin ribs.
Let them dry.
Instead of making clay stems, place a clean dry acorn cap on top after the pumpkin has fully dried.
Choose caps that fit the scale.
Leave the real cap natural.
Paint the pumpkin cream, ochre, faded orange, dusty green or brown.
The mix of natural material and painted clay gives the piece much more texture.
Scatter a few:
Just remember that tiny clay pieces are decorations, so keep them away from very young children and pets who may treat them as something worth tasting.
This one feels like an old botanical notebook turned into a pumpkin.
Try a simple leaf, mushroom, rosemary sprig, fern or berry branch.
Scratch the outline gently into the soft clay with a fine tool.
You do not need a perfect botanical drawing.
Simple lines work better.
Under the illustration, carve a short plant name or year.
For example:
FERN
SAGE
AUTUMN 2026
Keep the writing small.
The pumpkin should still look like decor, not a clay billboard.
Paint it cream or warm beige.
Brush watered-down brown lightly into the engraved drawing.
Wipe the surface before the wash dries fully.
The darker pigment stays in the carved lines.
Cottagecore is full of pressed flowers, herb journals, old garden books and objects that seem to carry a little history.
This pumpkin borrows that feeling without needing an actual antique.
Some decorations earn their shelf space by being useful.
This is one of them.
Start with a larger ball of clay.
Press your thumb into the center and slowly pinch outward.
Keep the walls thick enough to feel sturdy.
Once the bowl shape is formed, create pumpkin grooves around the outside.
Add a little separate stem on one edge if you like.
Use it for dry decorative or non-food items such as:
Do not assume homemade air-dry clay is suitable for direct food contact just because you added a sealer. Follow the safety information for the exact clay and finish you use.
Paint it mushroom, sage or antique white instead of bright orange.
Now it can stay on a dresser long after the rest of the fall box goes back into storage.
This is the project for the afternoon when you want to make something a little ridiculous in the best possible way.
A pumpkin becomes a tiny cottage.
Build the pumpkin around a suitable removable form or follow the instructions for the clay system you are using.
Add pumpkin ribs first.
Then create:
A detailed pumpkin fairy house tutorial from Sculpey is worth reading if you want to build a more involved hollow version.
Try cream, pale sage, mushroom brown and dusty blue.
The architecture supplies the whimsy.
The paint does not need to scream.
If you want the windows to glow, use a battery-operated light designed for crafts.
Skip the open flame.
Do not bury the finished cottage in twenty other decorations.
Put it on a small tray with one or two pinecones, a little moss and perhaps one book underneath.
Let the tiny house be the strange little star of the show.
If you are already making Thanksgiving table decor, make it do a job.
These miniature clay pumpkins hold names, menu labels or tiny gratitude notes.
Make walnut-sized pumpkins.
Add the ribs.
While the clay is still soft, create a narrow slot across the top.
Check that a small piece of card can sit in it without making the pumpkin tip.
Then remove the card while the clay dries.
For a warm table:
cream + rust
For a quieter table:
mushroom + sage
For something moodier:
deep brown + muted gold
The little slot can hold:
That gives the project a second life instead of making it useful for one dinner and eleven months in a storage tub.
For more seasonal surfaces around the house, these fall kitchen decor ideas can help you carry the same colors into the room without covering every counter.
This may be the easiest handmade gift in the whole list.
Shape one small pumpkin.
Add a slightly flatter bottom so it stands securely.
Create the ribs and stem.
Before it dries, insert a sturdy piece of wire in the top if your material and design can support it.
The wire can curl once at the top to hold a photograph or card.
Use:
Make three pumpkins.
Paint them in related colors.
Add three family photos.
Now the craft feels personal instead of merely seasonal.
That is the part people tend to keep.
If autumn crafting has officially taken over your table, you may also like these Halloween crafts for adults for projects that lean more decorative than kiddie.
The difference between a clay pumpkin you hide in a drawer and one you proudly put on the mantel often comes down to five small choices.
Do not make every pumpkin round.
Mix:
Real pumpkins already gave you permission to stop chasing perfect symmetry.
Choose three main colors and repeat them.
For example:
cream + sage + rust
or
mushroom + ochre + brown
or
antique white + faded green + terracotta
A restrained palette makes even very different projects feel like one collection.
A lace pumpkin beside a botanical pumpkin looks interesting.
Twelve pumpkins covered in lace, flowers, writing, moss and vines can start to look busy.
Let some pieces be simple.
They give the detailed ones room to shine.
Try a real twig stem.
An acorn cap.
A little dried grass.
A wooden tray.
A linen scrap beneath the arrangement.
That is one reason handmade autumn decor can feel so warm. Clay looks especially good beside materials that are imperfect too.
Three pieces are often enough.
A larger pumpkin, smaller pumpkin and one natural object can create a finished little vignette without turning the whole shelf into a pumpkin convention.
Air-dry clay can be forgiving.
It can also test your relationship with patience.
Here are the problems that usually make beginners think they ruined everything.
| Problem | Likely reason | What to try |
|---|---|---|
| Small surface cracks | Clay is drying or was worked too wet | Smooth minor cracks carefully with the method recommended by your clay maker |
| Pumpkin looks flat | Ribs were pressed too deeply | Use shallow grooves and build depth with paint |
| Stem keeps falling off | Joint is too weak | Score, join and support the stem using the method suitable for your clay |
| Bottom rocks | Base stayed rounded | Flatten the bottom gently before drying |
| Paint looks too bright | Color is too clean | Mix in cream, brown or a muted neighboring color |
| Details disappear | Paint covered the texture | Dry-brush raised areas or add a thin wash to recesses |
| Piece looks childish | Too many colors or details | Reduce the palette and remove one decorative element |
| Clay stays damp | Piece is thick or conditions are humid | Give it more drying time and follow the manufacturer’s instructions |
A pumpkin that feels dry on the outside may still hold moisture inside.
Thicker pieces take longer.
Follow the drying instructions supplied with your clay rather than deciding it has had “about a day” and attacking it with paint.
And do not blast it with random heat unless your clay manufacturer specifically says that method is safe for that product.
The craft will survive another day on the table.
Start with a small solid pumpkin.
Speckled heirloom pumpkins, sweater-imprint pumpkins and mini acorn-cap pumpkins require very little advanced shaping.
Once you can make a ball, flatten it slightly and add grooves, you have the basic pumpkin form.
Air-dry clay is convenient for home crafting because it does not require a kiln.
Polymer clay can also work, but it needs to be cured according to its manufacturer’s directions.
Choose the material based on the size of the project, the finish you want and how you plan to display it.
Keep the thickness reasonably even, avoid soaking the clay with water, make strong joins and allow the piece to dry according to the manufacturer’s instructions.
For small cracks, follow the repair method recommended for your exact clay rather than adding more and more water.
There is no single drying time that fits every brand and every pumpkin.
A tiny pumpkin and a thick hollow cottage can dry at very different speeds.
Check the package instructions and make sure the piece is fully dry before painting or sealing.
Only if the clay and finish you use are specifically suitable for the conditions.
Many common air-dry clays remain vulnerable to water even after a decorative sealer is applied.
An indoor mantel, shelf, console or covered display is the safer home for most projects.
A battery-operated tea light or small battery light is the better choice for decorative handmade clay houses.
You still get the warm window glow without putting a flame inside a craft material that was not designed as a candle holder.
Change the visual language.
Use faded colors, botanical impressions, small flowers, woodland details, natural stems, old-lace patterns, mushrooms, mossy greens, warm neutrals and irregular handmade forms.
The pumpkin remains seasonal.
It simply feels softer and more collected.
Older children can help with simpler projects under suitable adult supervision and according to the clay manufacturer’s age and safety guidance.
Keep craft knives, tiny parts and other sharp tools for adults.
The easiest child-friendly direction is usually shaping and painting a simple pumpkin.
You do not need to make all twelve cottagecore clay pumpkin craft ideas.
You do not even need to make three.
Pick the one that made you think, “I could actually do that.”
Make it a little crooked.
Give it a strange stem.
Paint it cream instead of orange if that suits your home better.
Press one tiny fern into the side.
Let your fingerprints survive somewhere.
The lovely thing about cottagecore is that the handmade part is not something you have to hide.
It is the whole point.
Choose one pumpkin from this list, clear a little space on the table, and make the version you would be happy to bring out again next autumn.
Explore original printables, find another story or save your next creative project.