Our Location
304 North Cardinal St.
Dorchester Center, MA 02124

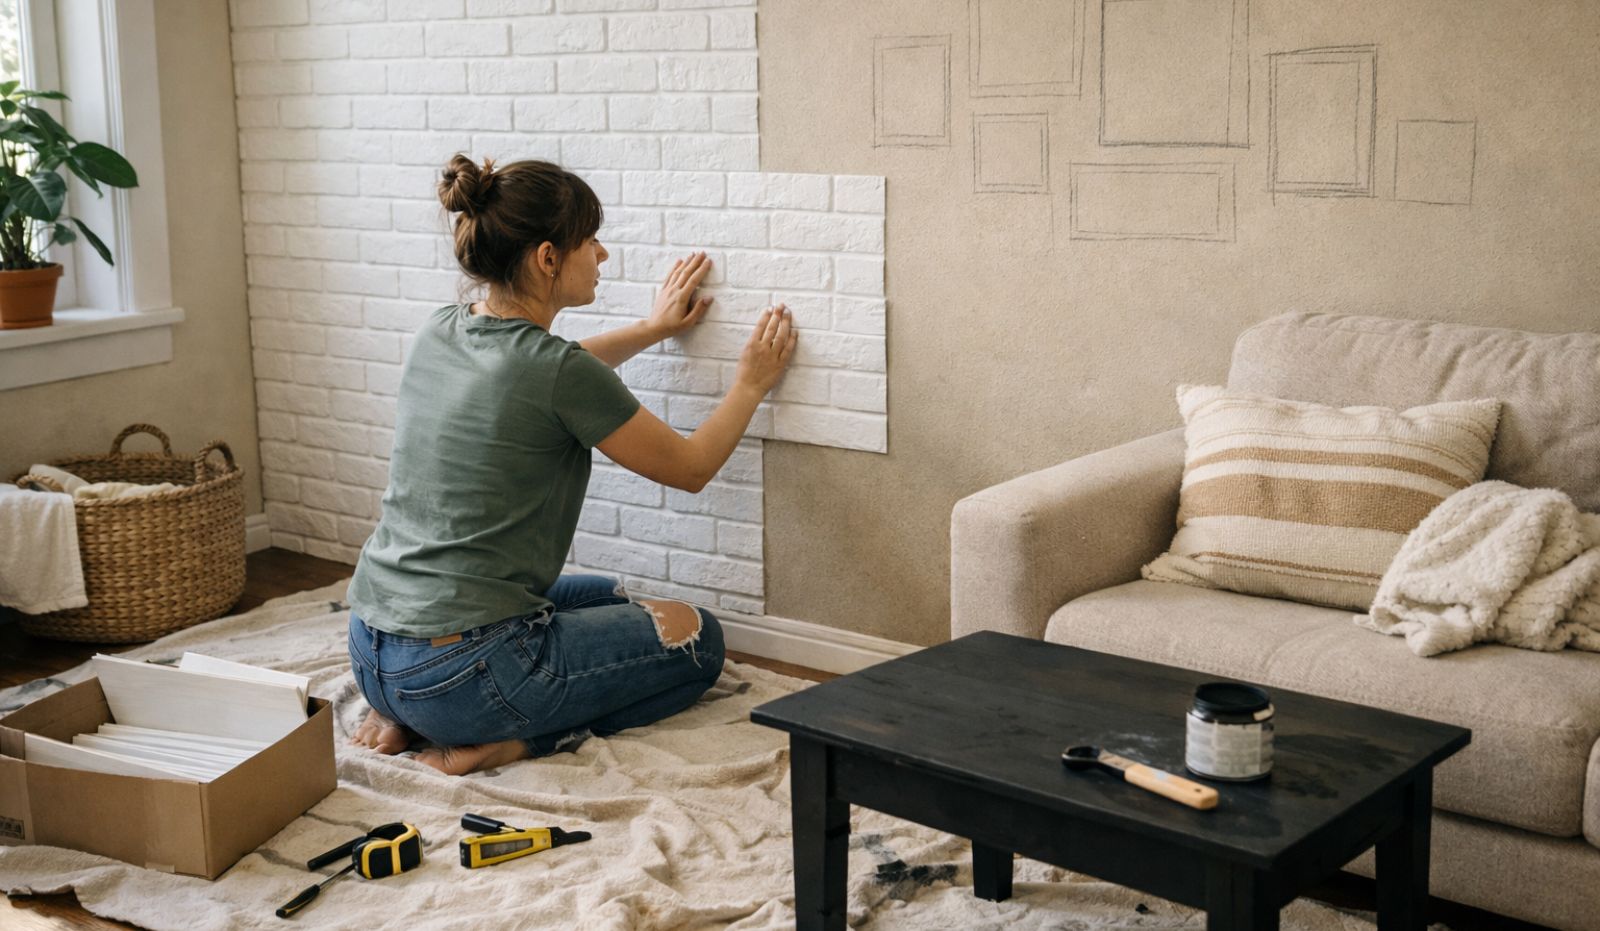
You’ve been staring at your living room for months now, knowing it needs something but feeling stuck because renovation budgets are fantasy numbers and you’re working with real family finances. The sofa works fine but looks tired. The walls feel bare but art is expensive. The whole space functions but doesn’t feel finished, and every solution you find online seems to require either a full gut renovation or a trust fund.
Here’s what most DIY content gets wrong: it shows you twenty-step projects that need specialty tools and professional-level skills, or it suggests “budget” changes that still cost $800. Real family budgets don’t work that way. This Family Haven Studio guide gives you fifteen genuinely doable DIY projects that transform how your living room looks and feels without requiring advanced skills, expensive tools, or unrealistic time commitments. These are changes you can actually complete while kids are at school or during nap time, using materials from hardware stores and basic supplies you probably already own.
Decor Style + Context: Modern farmhouse or transitional family home, particularly effective in living rooms where one wall feels blank and overwhelming but painting alone won’t create enough visual interest or architectural detail.
Why This Works: Horizontal plank walls add the architectural texture and visual weight that builder-grade homes often lack. When you create this feature wall behind your sofa, you’re giving that furniture arrangement an intentional backdrop that makes the whole seating area feel designed rather than just placed. The horizontal lines also make walls appear wider, which helps in narrow living rooms. This project costs a fraction of true shiplap or tongue-and-groove installation because you’re using basic dimensional lumber or even plywood ripped into strips, then painting it all one color. The texture comes from the slight shadows between boards, not from expensive materials.
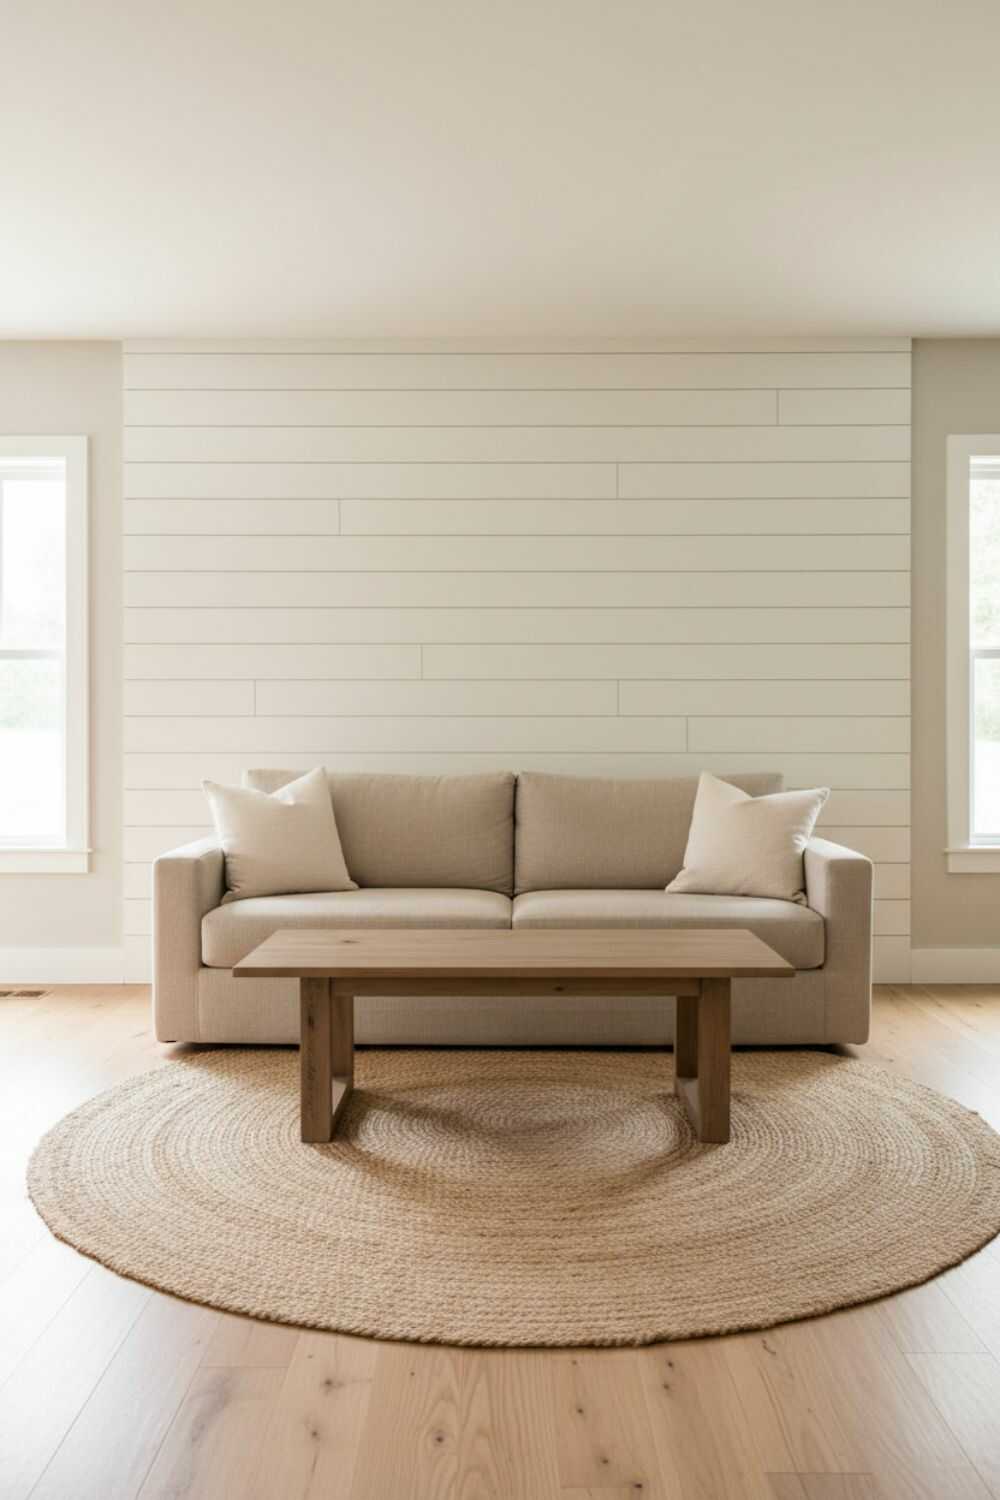
How to Apply It: Purchase 1×6 or 1×8 common pine boards (or rip 1/4-inch plywood into 6-inch strips for even lower cost). Calculate your wall square footage and buy accordingly. Use a level and find your studs. Start at the bottom and work up, attaching boards horizontally with a nail gun or construction adhesive and finish nails, leaving a nickel-width gap between each board for shadow lines. Continue to ceiling height. Fill nail holes with wood filler, sand lightly, then paint the entire wall—boards and gaps—in one color (warm white, soft gray, or even a deep navy all work beautifully). The whole project costs $75-150 depending on wall size and takes one weekend. No special carpentry skills needed beyond using a level and cutting straight lines.
Common Mistake: Using boards that are too thin (like 1×2 or 1×3). These create a busy, cluttered look rather than the calm, substantial texture you want. Stick with 1×6 or 1×8 for proper scale in a living room. Also, don’t skip painting—raw wood can look unfinished and cheap rather than intentional.
Decor Style + Context: Works across all styles from modern to traditional, essential for family living rooms that need both display space and actual storage without adding bulky furniture that shrinks the room visually.
Why This Works: Floating shelves solve the eternal living room problem: you need places to put things (books, photos, kids’ art, plants, baskets of remotes and chargers) but every bookcase or storage unit you add makes the room feel smaller and more cluttered. DIY floating shelves cost $15-25 per shelf versus $60-150 for store-bought versions, and they create storage and display that doesn’t eat into your floor space. When you build them yourself, you control the exact length to fit your specific wall, and you can create a custom arrangement that works with your room’s proportions rather than making your space adapt to whatever shelving units stores happen to sell.
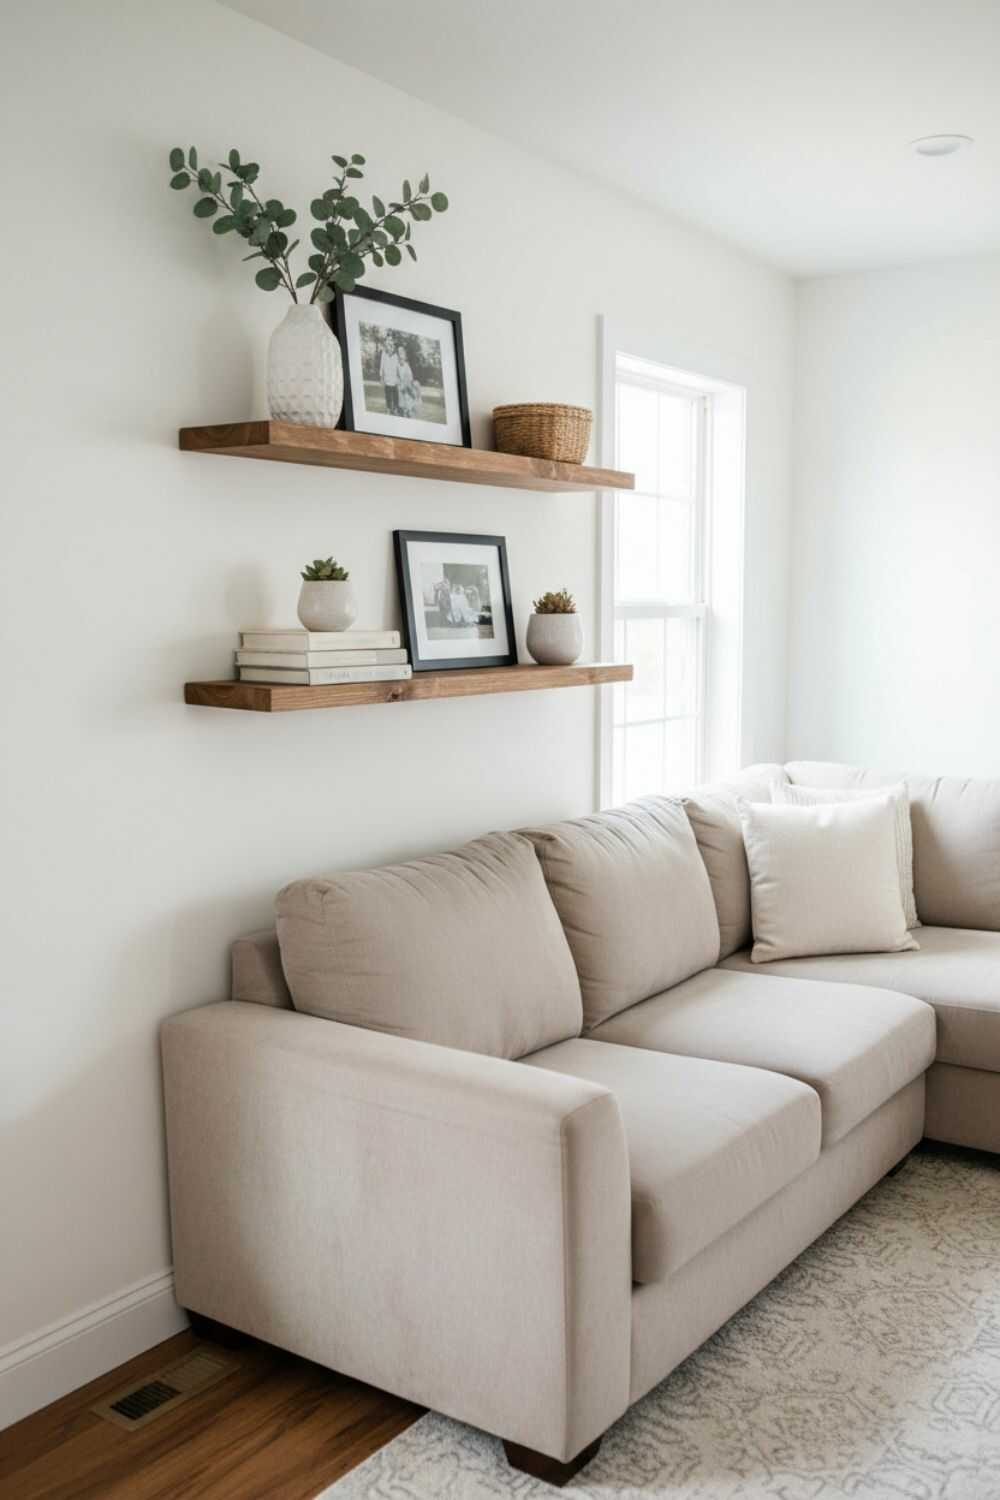
How to Apply It: Cut 2×10 or 2×12 pine boards to your desired length (48-72 inches works well for most living rooms). Sand all edges smooth. Stain or paint to match your room—natural wood stain, warm walnut, or painted to match your trim all work. Mount using heavy-duty floating shelf brackets secured into wall studs (these hide inside the shelf so you don’t see them). Space multiple shelves 14-16 inches apart vertically for proper proportions. Style with a mix of functional items (baskets with remote controls, small bins with toys) and decorative items (plants, frames, a few meaningful objects). The key is restraint: don’t fill every inch of shelf space or you recreate the clutter problem you’re trying to solve.
Pro Tip: Build shelves that are one foot shorter than your sofa width if they’re going above the sofa, or build them in pairs flanking a window or TV. Odd numbers (three shelves) or symmetrical pairs look more intentional than random single shelves scattered around. Also, paint or stain the bottom of your shelves—people can see underneath them from seating positions.
Pin-Friendly Takeaway: DIY floating shelves cost $15-25 each and create display-plus-storage that doesn’t shrink your room like bookcases do, with exact lengths customized to your specific walls.
How to Apply It: Remove any hardware. Sand the entire surface with 120-grit sandpaper (use an orbital sander if you have one, or hand-sand if you don’t—it just takes longer). Wipe clean with tack cloth. If painting: apply primer, let dry, then two coats of paint in your chosen color. If staining: apply wood conditioner (critical for even color), then stain with a brush or rag, wiping off excess. Let dry completely, then seal with polyurethane in matte or satin finish (apply 2-3 thin coats, sanding lightly with 220-grit between coats). Total cost with all materials: $25-50. Total time: 6-8 hours spread over a weekend (most of that is drying time between coats).
Pro Tip: If your table has deep gouges or damage, fill them with wood filler before sanding. Let the filler dry completely (usually overnight), then sand smooth before staining or painting. The filler will absorb stain differently than wood, so for badly damaged tables, painting often gives better results than staining.
Pin-Friendly Takeaway: Refinishing your existing coffee table with stain or paint costs $25-50 and takes one weekend, giving you a custom piece that matches your current style instead of buying new.
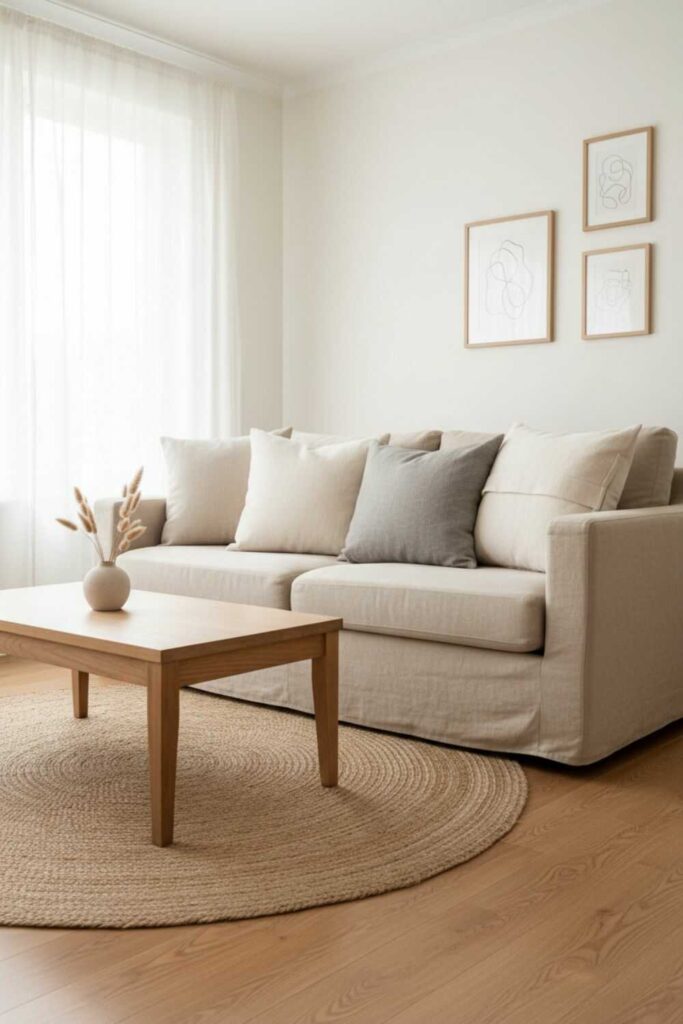
Decor Style + Context: Transitional, modern farmhouse, or eclectic family home, perfect for large blank walls in living rooms where store-bought gallery wall sets look generic and don’t reflect your actual family life.
Why This Works: Large blank walls make rooms feel unfinished, but filling them with art is expensive—framed prints cost $40-100 each, and you need multiple pieces for proper scale. A thrifted frame gallery wall costs $30-60 total and looks infinitely more personal and interesting than matching store-bought sets. When you collect mismatched frames from thrift stores and spray paint them all the same color (white, black, or gold), they become a cohesive collection that holds your actual family photos, kids’ art, or free printables from the internet. This approach gives you custom wall art that reflects your real life rather than generic prints of Paris or inspirational words that don’t mean anything specific to your family.
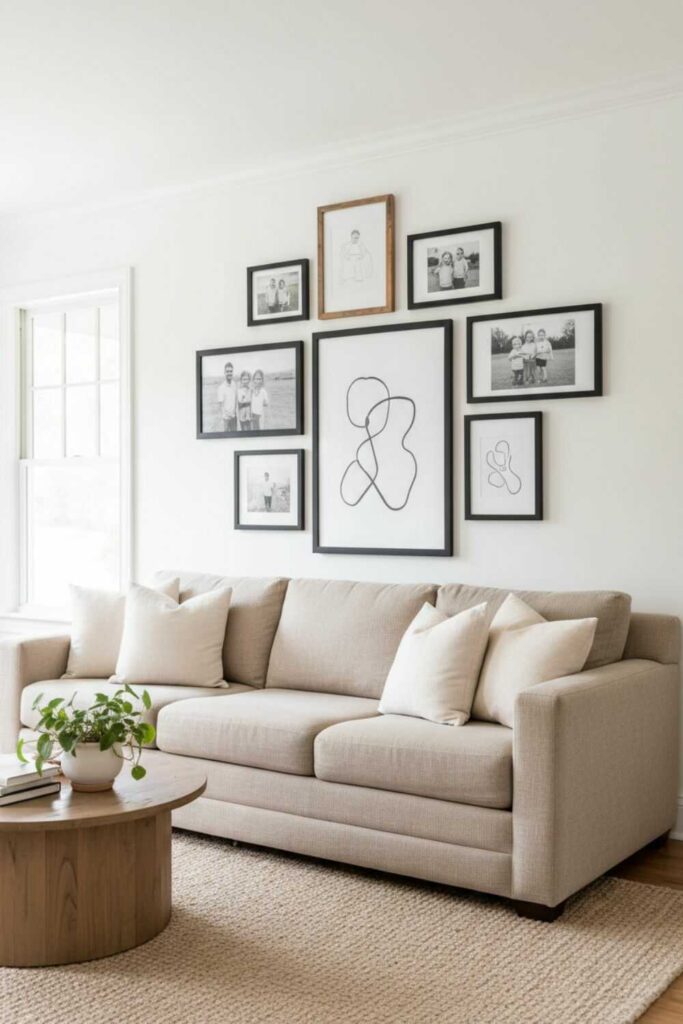
How to Apply It: Visit thrift stores and collect 7-12 frames in different sizes and styles (look for interesting shapes—not just rectangles). Buy spray paint in one unifying color (matte white, matte black, or metallic gold all work beautifully). Spray paint all frames outside or in a well-ventilated garage, applying 2-3 light coats. Let dry completely. Print photos or art sized to fit your frames—you can use Walgreens or CVS photo printing (pennies per print) or print at home. Lay all frames on the floor and arrange them before hanging, taking a photo of your final arrangement. Start hanging from the center and work outward, using a level and measuring as you go. Total cost: $30-60 including frames, spray paint, and photo prints.
Common Mistake: Hanging frames too far apart. In a gallery wall, frames should be 2-3 inches apart maximum—closer than feels comfortable when you’re planning. Too much space between frames makes the arrangement look scattered rather than intentional. Also, don’t make every frame the same size—varied sizes create more visual interest.
Pin-Friendly Takeaway: A gallery wall using $30-60 worth of thrifted frames spray painted one color creates personal, meaningful wall art that reflects your actual family instead of generic store-bought prints.
Decor Style + Context: Modern farmhouse, transitional, or Scandinavian family home, especially valuable in living rooms where the sofa floats away from walls and you need both visual grounding and functional surface space behind it.
Why This Works: Store-bought console tables cost $200-600, but you can build a simple version for $40-70 that looks equally good and fits your exact measurements. When your sofa sits away from the wall (common in open-plan homes or when you’re creating walkways behind furniture), a console table behind it makes that arrangement feel intentional rather than awkward. It gives you surface space for lamps, plants, or charging stations, and it creates visual weight that anchors your seating area. DIY versions using 2x4s or 2x6s and basic carpentry create the modern farmhouse look that’s popular right now, and you can customize the length to exactly fit your sofa width and the height to match your sofa back.
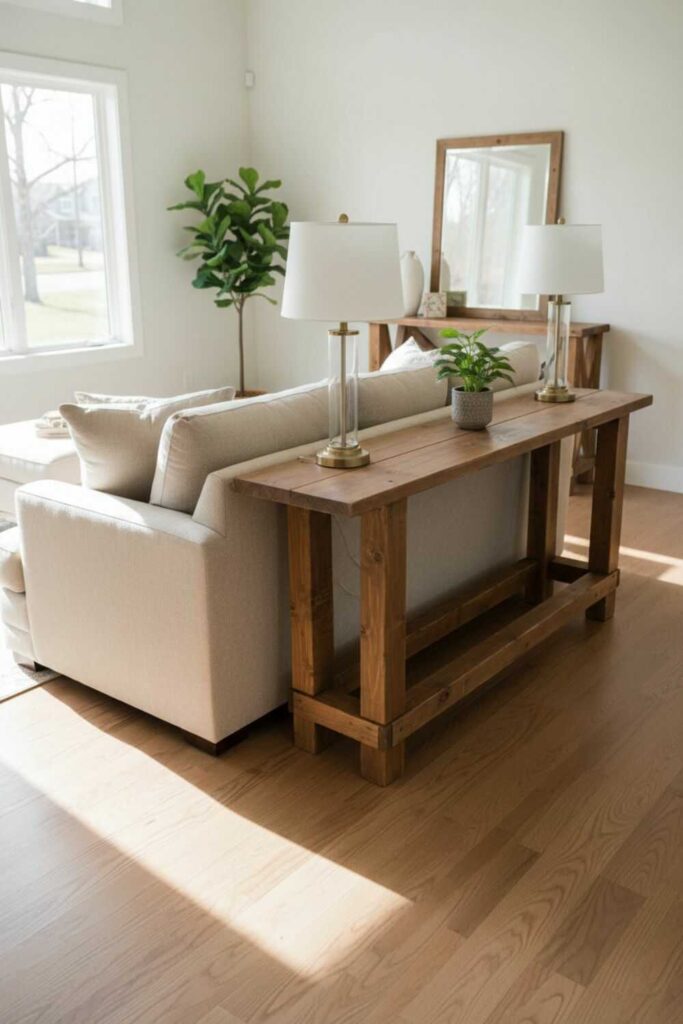
How to Apply It: This is a beginner woodworking project requiring basic tools: saw, drill, screws, sandpaper, and stain or paint. Build a simple frame using 2×4 lumber for legs (two at each end, connected by cross braces) and a 2×10 or 2×12 board for the top surface. Overall dimensions: 10-12 inches deep, 30 inches tall (level with typical sofa backs), and 2-6 inches shorter than your sofa width. Assemble with wood screws, countersinking screw heads. Sand everything smooth, then stain or paint. Seal with polyurethane if using stain. Total cost: $40-70 in lumber and supplies. Total build time: 3-4 hours. Plenty of free plans online walking through step-by-step if you search “DIY sofa table 2×4.”
Pro Tip: Add a lower shelf about 6 inches off the floor for extra storage (baskets, books, or blankets fit here). This costs an additional $10-15 in materials but doubles functionality. Also, stain or paint your console the same color as your coffee table or other wood furniture in the room for a cohesive, intentional look.
Pin-Friendly Takeaway: A DIY console table built from 2×4 lumber costs $40-70 and takes 3-4 hours, creating custom behind-sofa storage and visual weight in the exact size your room needs.
Decor Style + Context: Universal across all styles, essential for family living rooms where your pillow inserts are fine but the covers are outdated, stained, or just don’t match your current color scheme anymore.
Why This Works: New throw pillows from stores cost $25-60 each, and you need 4-6 pillows to properly style a living room sofa. That’s $100-360 just for pillows. Making or updating pillow covers costs $5-12 per pillow using fabric from fabric stores or even thrifted materials. This transforms your sofa’s entire look for a fraction of the cost. Fresh pillow covers in new colors instantly update your room’s color palette, add pattern where you didn’t have it, or create cohesion by pulling together colors from your rug, curtains, or art. For families with kids, washable pillow covers you can easily remove and throw in the washing machine are infinitely more practical than expensive store-bought pillows that can’t be cleaned.
How to Apply It: For no-sew version: Cut fabric to size (measure your pillow insert, add 6 inches to width and height), fold edges to create an envelope closure on the back, and use iron-on hem tape or fabric glue to seal edges. Slip over your existing pillow insert. For sewn version: Cut two fabric squares (1 inch larger than your insert on all sides), sew three sides right-sides-together with 1/2-inch seam allowance, turn right-side-out, insert pillow, hand-stitch the fourth side closed or add an envelope closure. Buy fabric remnants (often 50% off), canvas drop cloths that you can dye, or even use vintage linens from thrift stores. Total cost per pillow: $5-12. Time per pillow: 20-40 minutes depending on sewing skills.
Common Mistake: Using fabric that’s too thin or delicate for pillows that will be used daily. Choose medium-weight cotton, canvas, linen, or cotton-linen blends. Avoid sheers, silks, or anything that will wrinkle badly or show every fingerprint. Also, make covers slightly smaller than your insert (the cover should hug the insert snugly) or your pillows will look flat and sad.
Pin-Friendly Takeaway: DIY or no-sew pillow covers cost $5-12 each and take 20-40 minutes, instantly updating your sofa’s look with fresh colors and washable covers instead of buying expensive new pillows.
Decor Style + Context: Modern farmhouse, Scandinavian, or industrial style family home, perfect for living rooms where you need window treatments but quality ready-made curtains cost $60-150 per panel and your windows need custom lengths anyway.
Why This Works: Canvas drop cloths (the kind painters use) cost $12-25 each depending on size, and each drop cloth makes one or two curtain panels depending on your window height. The heavy canvas fabric has a natural, organic texture that looks intentional and high-end—not cheap or flimsy like many ready-made curtains. Drop cloth canvas is also durable enough to withstand family living (kids pulling on them, pets brushing against them, daily opening and closing) and can be dyed any color you want or used in its natural cream-tan color that coordinates with nearly everything. When you hem them yourself to your exact window height, you get the polished floor-length look that makes rooms feel finished and expensive.
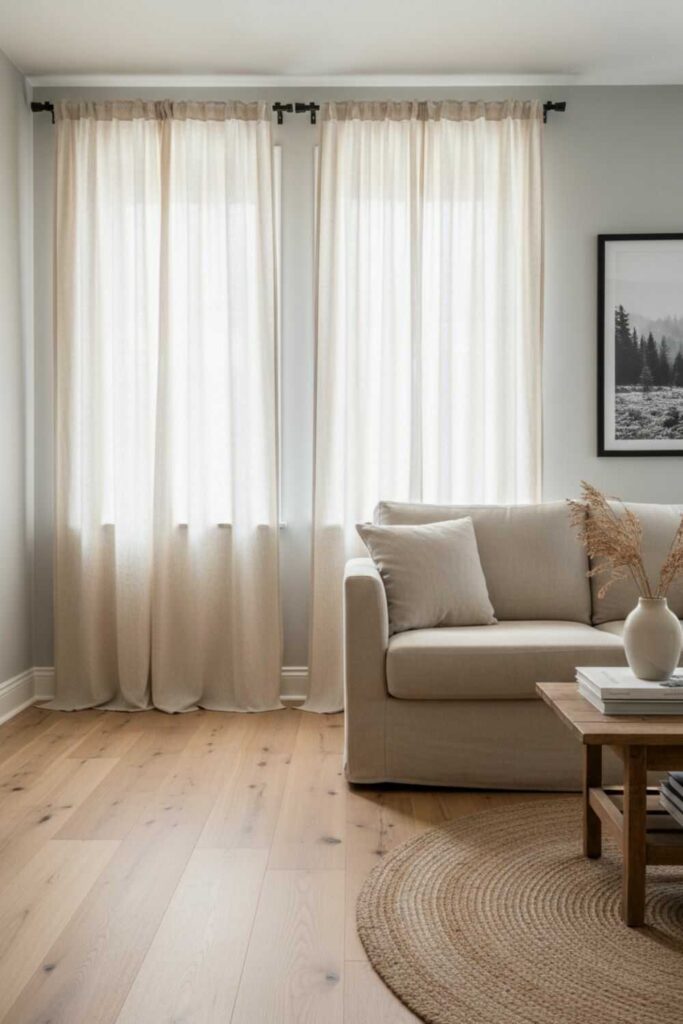
How to Apply It: Buy canvas drop cloths sized appropriately for your windows—9×12 foot drop cloths work for most standard windows. Wash and dry them first (they’ll shrink slightly and soften). Cut to your desired width (1.5-2 times your window width for proper fullness) and length (floor length looks most polished). Hem the sides and bottom using iron-on hem tape (no-sew option) or a sewing machine (sewn hems look more professional). Add clip rings to the top edge or sew a rod pocket if you prefer. Hang on a curtain rod. Total cost per window: $25-50 including drop cloths, hem tape, and curtain rings. Time: 1-2 hours per window.
Pro Tip: If you want color, dye the drop cloths before hemming using fabric dye in your washing machine. Warm gray, soft blue, and sage green all work beautifully. Dye two shades lighter than you want—the heavy canvas doesn’t absorb dye as intensely as regular cotton fabric.
Pin-Friendly Takeaway: DIY curtains from canvas drop cloths cost $25-50 per window and give you custom-length, durable, natural-looking window treatments instead of expensive ready-made curtains that never quite fit.
Decor Style + Context: Modern, industrial, or contemporary family home, essential for living rooms where store-bought TV stands are either too expensive ($400-800) or the wrong size for your specific TV and room layout.
Why This Works: Media consoles take up significant visual space in living rooms, so when they’re the wrong style or size, they throw off your entire room. Building your own using basic lumber and simple construction lets you create exactly the length you need (maybe you want it to match your sofa width), exactly the height that works with your seating (so you’re not craning your neck to watch TV), and exactly the style that matches your room. DIY media consoles using 2×4 or 2×2 frames with plywood or board tops cost $60-120 depending on size and finish, versus $400-800 for store-bought versions. You also get to add the exact storage you need—open shelving for components, closed storage for toys and cords, or a combination.
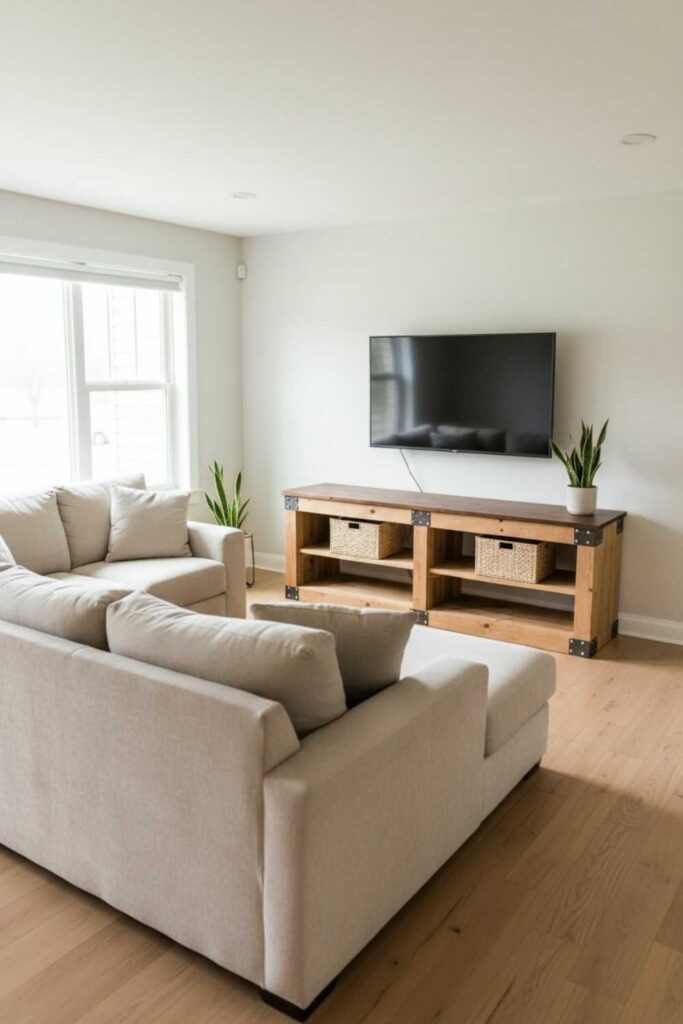
How to Apply It: This is a beginner-intermediate woodworking project. Build a basic rectangular frame using 2×4 lumber for the structure (legs and cross supports), with a top surface made from 3/4-inch plywood or 1×12 boards. Add middle shelves using additional boards for component storage. Dimensions depend on your TV size, but typical consoles are 16-18 inches deep, 24 inches tall, and 60-72 inches wide. Assemble with wood screws, countersinking heads. Sand everything smooth, then stain or paint. For an industrial look, use hairpin legs (purchased separately, $30-40 for a set) instead of building wood legs. Total cost: $60-120. Build time: 4-6 hours. Search “DIY TV console plans” for step-by-step builds.
Common Mistake: Building a console that’s too narrow for your TV’s base. Measure your TV’s base width and build your console at least 6 inches wider on each side—12 inches total wider than the TV base. This creates proper visual proportion and makes the TV look anchored rather than precarious.
Pin-Friendly Takeaway: A DIY media console built from basic lumber costs $60-120 and takes 4-6 hours, creating exactly the size and style you need instead of adapting your room to whatever stores sell.
Decor Style + Context: Abstract modern, contemporary, or eclectic family home, perfect for living rooms with one large blank wall where properly scaled art from stores costs $300-800 but you need something big enough to make visual impact.
Why This Works: Large walls need large art—it’s a design rule that can’t be broken without your room looking unfinished. But large art is expensive. A 48×60 inch canvas or print from stores costs $400-800. Creating your own large-scale art using a canvas from art supply stores and acrylic paint costs $40-80, and it doesn’t require artistic talent if you stick with abstract designs, color blocks, or geometric patterns. When you create art specifically for your space, you control the colors (pulling from your existing room palette), the size (exactly what your wall needs), and the style (modern, traditional, or somewhere in between). Even simple abstract brushstrokes or color-blocked designs look intentional and expensive when they’re properly scaled and framed.
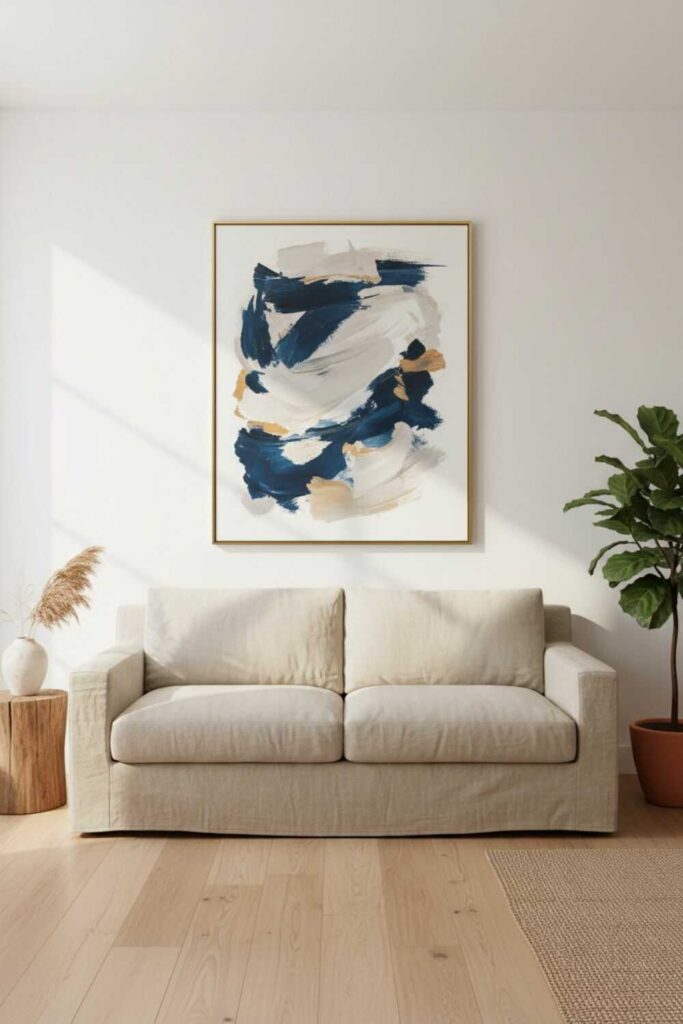
How to Apply It: Buy a large stretched canvas (40×50, 48×60, or 30×40 inches) from an art supply store or online ($20-50 depending on size). Choose 3-4 colors that coordinate with your room—pull colors from your rug, pillows, or curtains. Use acrylic paint (inexpensive, fast-drying, available at craft stores). Create abstract art using simple techniques: geometric color blocks (tape off sections with painter’s tape, paint each section a different color), brushstroke art (large swooping brushstrokes in coordinating colors), or textured layers (apply paint thickly with a palette knife or old credit card). Let dry completely. Hang using heavy-duty picture hanging hardware. Total cost: $40-80. Time: 2-3 hours plus drying time.
Common Mistake: Going too small. If your wall is 8 feet wide, you need art that’s at least 40-50 inches wide or it will look like a postage stamp. When in doubt, go bigger. Also, don’t overthink it—abstract art is forgiving, and “imperfect” brushstrokes often look more interesting than overly planned designs.
Pin-Friendly Takeaway: DIY large-scale abstract art costs $40-80 and takes 2-3 hours, giving you properly scaled wall art in your exact colors instead of spending $400-800 on store-bought pieces.
Decor Style + Context: Works across all styles, essential for open-plan family homes where dining chairs are visible from the living room and dated upholstery makes the whole space feel tired even when the chair frames are perfectly sound.
Why This Works: Chair reupholstery seems intimidating but it’s actually one of the simplest DIY projects if you’re working with dining chairs that have removable seats (most do). New dining chairs cost $80-200 each, so replacing a set of four costs $320-800. Reupholstering those same four chairs costs $40-80 total using fabric remnants from fabric stores (often sold at 50% off regular fabric prices because they’re end-of-roll pieces). Fresh fabric in new colors instantly updates your dining area, which visually impacts your living room in open-plan homes. You can coordinate the new chair fabric with your living room colors, creating cohesion between the two spaces.
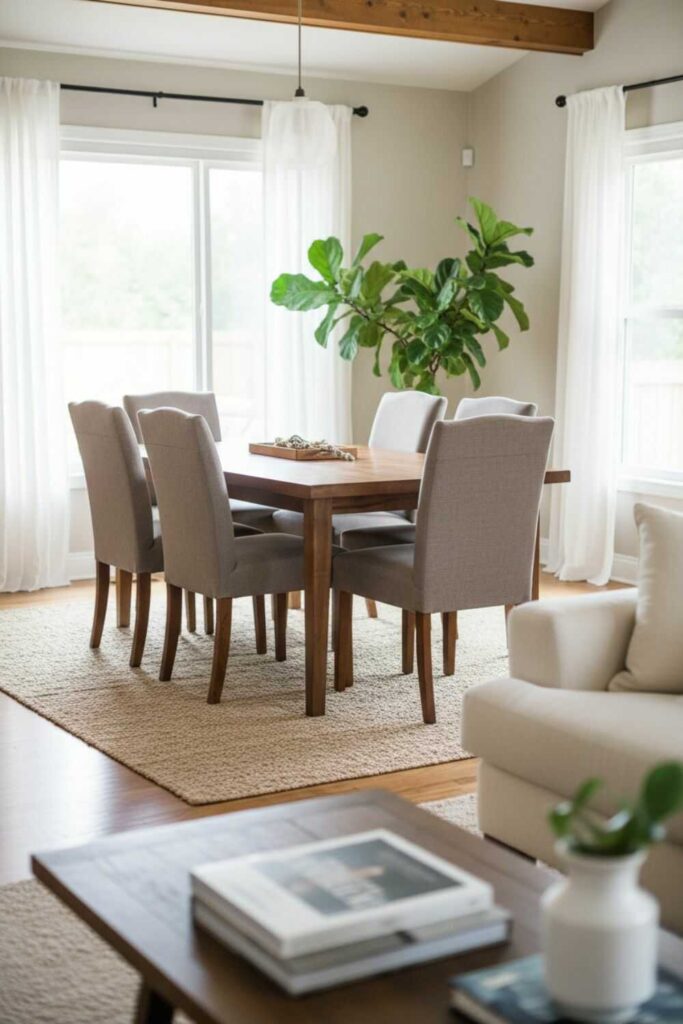
How to Apply It: Remove chair seats (usually just four screws underneath). Remove old fabric, pulling out staples carefully. Cut new fabric 3-4 inches larger than the seat on all sides. Center fabric over seat, pull taut, and staple to the underside of the seat using a staple gun, working from center of each side outward and pulling fabric tight as you go. Fold corners neatly (hospital corners or pleated corners both work), stapling securely. Trim excess fabric. Reattach seats to chair frames. Total cost per chair: $10-20. Time per chair: 20-30 minutes once you get the rhythm.
Pro Tip: If your old foam is compressed or lumpy, add a layer of 1-inch foam or batting on top of the existing foam before adding fabric. This costs an extra $2-3 per chair but makes them much more comfortable. Also, choose fabric with some pattern or texture—solid light colors show every spill and crumb in family dining spaces.
Pin-Friendly Takeaway: Reupholstering dining chairs with fabric remnants costs $10-20 per chair and takes 20-30 minutes each, updating your dining area without buying new chairs and creating cohesion with your living room.
Decor Style + Context: Traditional or transitional family home, particularly effective in living rooms that feel plain and builder-grade where adding this one architectural element elevates the entire space without major renovation.
Why This Works: Crown molding is the detail that separates custom homes from builder-grade homes. It creates a visual transition between walls and ceiling, makes ceilings appear taller, and adds the kind of architectural character that makes rooms feel finished and expensive. Professional installation costs $4-8 per linear foot. DIY installation costs $1-2 per linear foot—you’re paying only for materials, not labor. When you add crown molding to your living room, you’re making a change that affects how the entire room reads. It’s one of those “before and after” projects where people can’t quite identify what changed but know the room looks dramatically better.
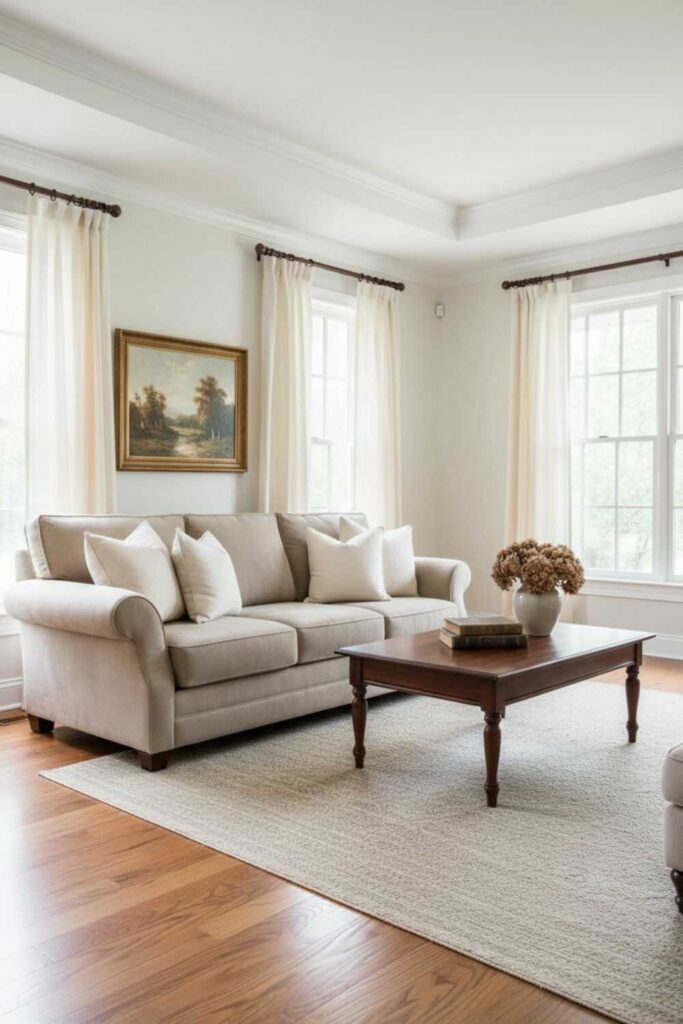
How to Apply It: This requires a miter saw (or access to one—some hardware stores will cut angles for you) and basic carpentry skills. Measure your room’s perimeter to calculate linear feet needed. Buy pre-primed MDF or pine crown molding (3.5-4.5 inch projection looks appropriate in living rooms with 8-foot ceilings). Cut 45-degree angles for corners using a miter saw. Attach to wall-ceiling junction using construction adhesive and finish nails into ceiling joists and wall studs. Fill nail holes with wood filler, caulk gaps where molding meets wall and ceiling, then paint. Total cost for a 14×16 room: $50-90. Time: One full day including painting.
Common Mistake: Using crown molding that’s too small. In living rooms with 8-foot ceilings, you need at least 3.5-inch projection molding; anything smaller looks like trim rather than crown molding. Also, don’t skip the caulking step—perfectly caulked seams make the difference between DIY that looks homemade and DIY that looks professional.
Pin-Friendly Takeaway: DIY crown molding costs $1-2 per linear foot versus $4-8 professionally installed, adding architectural detail that makes your living room feel custom and finished instead of builder-grade.
When you’re looking at this list and feeling overwhelmed, here’s how to choose your first project:
If You Want Maximum Visual Impact with Minimum Skill: Start with a bold accent wall (project #3) or ceiling paint (project #11). These require only basic painting skills but create dramatic transformation. One weekend, one gallon of paint, totally different room.
If You Want to Build Confidence with Easy Wins: Try throw pillow covers (project #7) or reupholstering dining chairs (project #13). These are hard to mess up, cost very little, and give you finished results in under an hour per piece. Success builds momentum.
If You’re Ready to Learn Basic Carpentry: DIY floating shelves (project #2) or a console table (project #6) teach fundamental skills—measuring, cutting, basic assembly—that you’ll use in future projects. Start with one shelf or a simple console, master those skills, then tackle more complex builds.
If You Need Function More Than Beauty: The media console (project #10) or sofa table (project #6) solve real storage and surface space problems while also looking good. When DIY solves actual daily frustrations, you’ll use and appreciate it more.
Here’s the honest cost breakdown for transforming your living room using multiple projects from this list:
Starter Budget ($150-250): Choose three projects: accent wall + throw pillows + thrifted gallery wall. These three changes create color, personalization, and focal points without requiring tools beyond basic painting supplies.
Medium Budget ($300-500): Add architectural details: accent wall + floating shelves + board and batten or crown molding. These add both visual interest and functional storage while teaching basic carpentry skills.
Full Transformation Budget ($500-800): Combine impact projects: plank wall + painted ceiling + DIY console table + refinished coffee table + new curtains + gallery wall. This gives you a completely transformed room that looks custom designed for less than one store-bought sofa would cost.
Compare this to typical living room makeover costs:
One piece of new furniture costs what it takes to DIY an entire room transformation.
Pick one project. Not three, not five—one. Buy the materials this week. Block off next Saturday morning. Do the project. Live with it for a week and see how it makes you feel when you walk into your living room.
Then come back to this guide and pick your next project.
Transformation doesn’t happen in one weekend. It happens in fifteen weekends over six months, one project at a time, each one teaching you something and making your home feel more like yours.
Save this guide. You’ll come back to it when you’re ready for the next change.